How To: Downgrade iOS 11 Back to iOS 10.3.3 on Your iPhone
There's lots of new stuff in iOS 11, but just because things have changed doesn't mean they're better. So if you've updated to Apple's latest OS and decided it wasn't for you, you'll be happy to know that you can still go back to iOS 10.3.3.But this window of opportunity for downgrading won't last forever. Now that iOS 11 has gone official, Apple will soon stop signing old firmware versions, meaning you won't be able to roll back unless you've saved your SHSHS2 blobs. So it's your last chance to get the Auto-Brightness setting back to normal or avoid other annoying changes.UPDATE: Apple is no longer signing iOS 10.3.3, so your chance to downgrade back from iOS 11 is no longer an option. However, you can still use this guide to downgrade an iOS 11.X.X version back to a previous iOS 11 version that's still be signed by Apple. The process is the same.Until that day comes, however, it's actually quite easy to revert to iOS 10.3.3. All you need is a Mac or Windows PC, and the process only takes a few minutes of work, so let's go ahead and get started, shall we?Don't Miss: The Most Annoying Changes in iOS 11 (& How to Fix Them)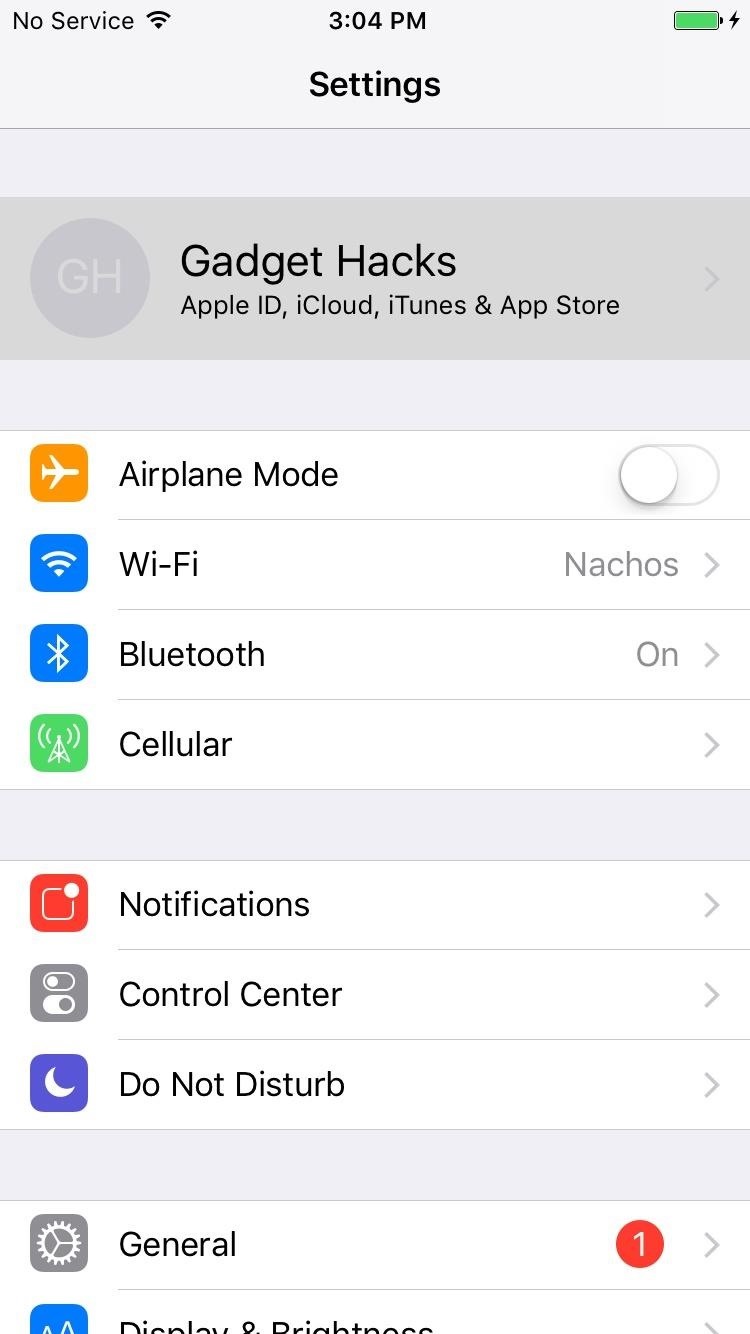
Step 1: Disable 'Find My iPhone'First, you'll need to disable Find My iPhone. To do that, head to Settings, then tap your name at the top of the list and select "iCloud." From here, select "Find My iPhone," then make sure to turn off the toggle switch on the following screen.
Step 2: Download the IPSW File for Your DeviceNext, you'll need to download the iOS 10.3.3 IPSW file for your particular device. This is a firmware file you'll be installing with iTunes to roll back your operating system, and luckily, we have a highly trusted source where you can get this file. So head to the following link from your computer, then pick your device and model.Download the iOS 10.3.3 IPSW file for iPad, iPhone, or iPod touch From here, choose iOS 10.3.3 when prompted, then click the "Download" button. The file is rather large, so it may take a while to download, but make sure to note the file's location once it's finished.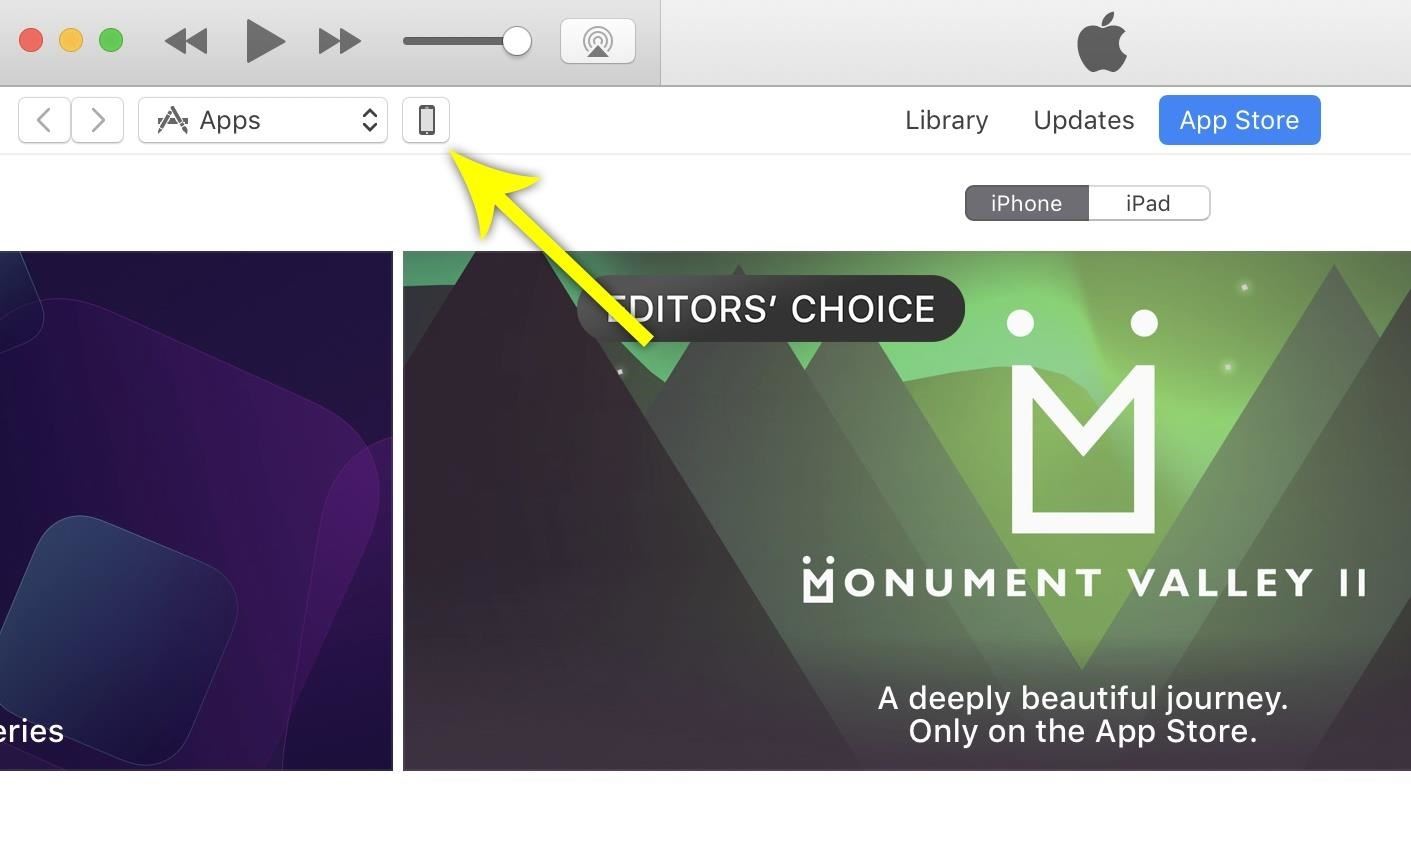
Step 3: Connect to iTunesNext, connect your device to your computer with a Lightning cable, then open iTunes if it doesn't launch automatically. From there, make sure the phone icon appears near the top-left corner of the window — this signifies that iTunes has recognized your device.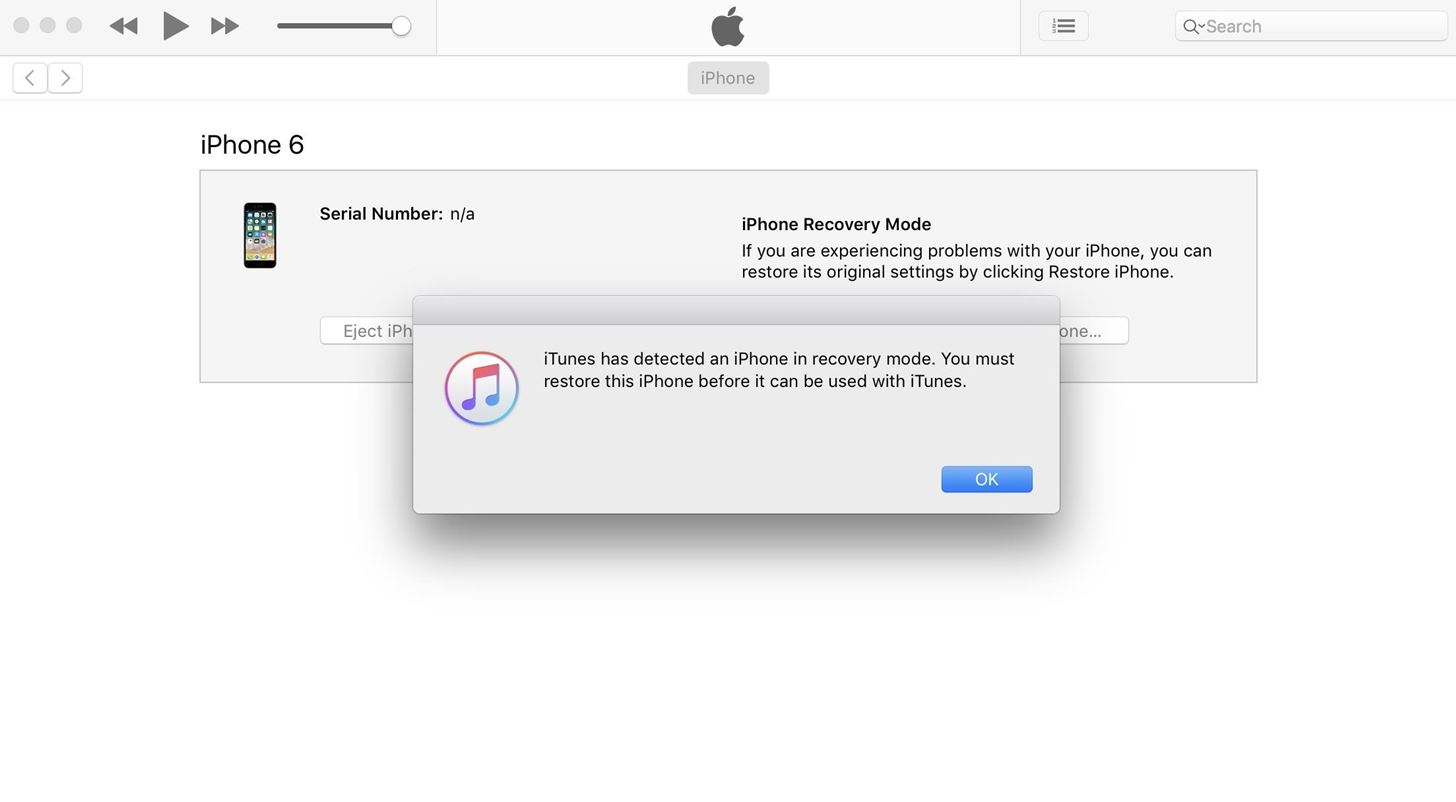
Step 4: Put Your Phone into DFU ModeNext, turn off your phone while it's still connected to the computer. This can be done by pressing and holding the sleep/wake button, then swiping the slider.From there, you'll need to boot into DFU mode. This varies depending on what device you own.iPhone 7 or 7 Plus: While the phone is turned off and connected to iTunes, press and hold the sleep/wake button for 3 seconds. From there, press and hold the volume down button while still holding the sleep/wake button. After 10 more seconds, release the sleep/wake button, but continue holding the volume down button. Wait 5 more seconds, then release the volume down button — if the screen is still black, you're in DFU mode. If you see the Apple logo or a "Connect to iTunes" message instead, try again. iPhone 6s or older: While the phone is turned off and connected to iTunes, press and hold the home button and the sleep/wake button simultaneously. After 10 seconds, release the sleep/wake button, but continue holding the home button. Wait 10 more seconds, then release the home button — if the screen is still black, you're in DFU mode. If you see the Apple logo or a "Connect to iTunes" message instead, try again. Once you've successfully entered DFU mode, iTunes will display a message confirming that the phone is in recovery mode. Click "OK" here.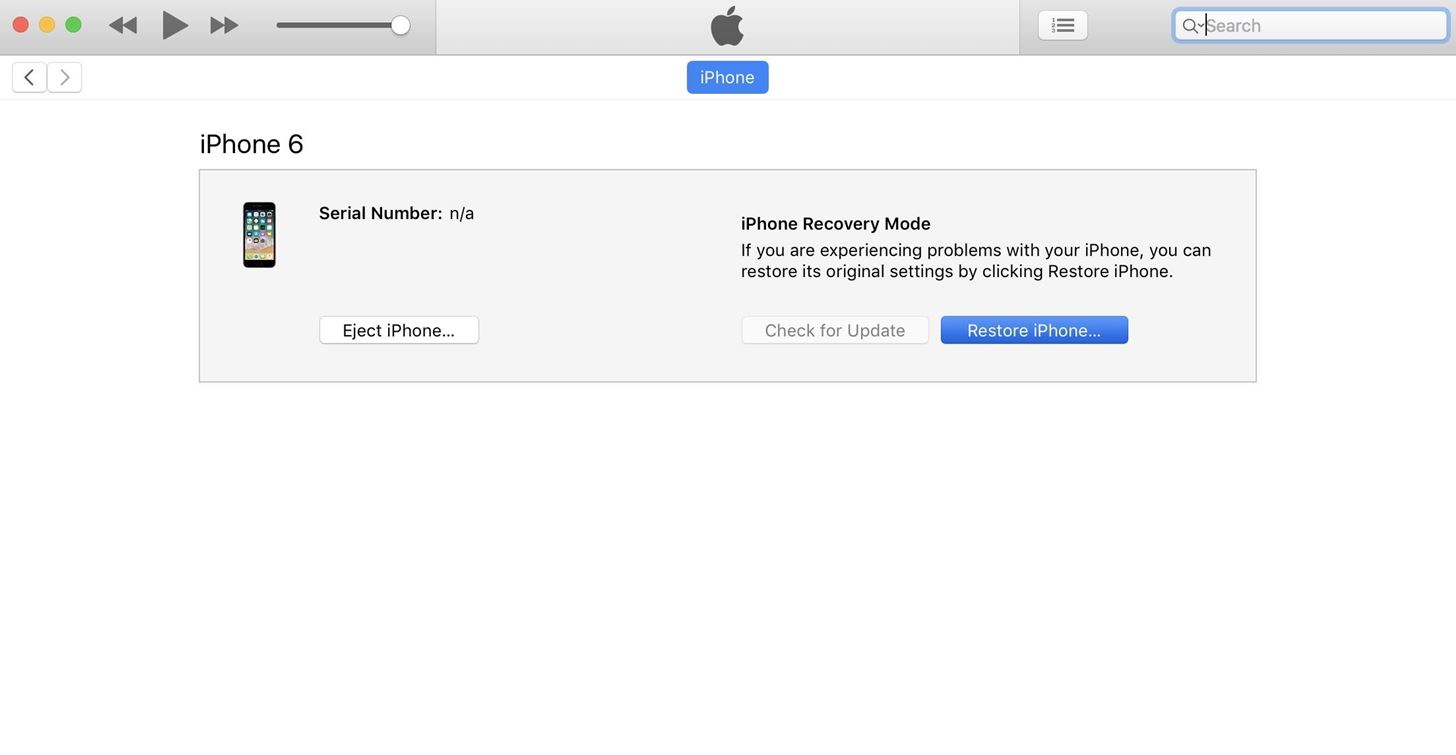
Step 5: Install the Older FirmwareAfter that, if you're using a Mac, hold down the Option button on your keyboard. Otherwise, if you're running Windows, hold down the Shift button. While still holding the keyboard button, click "Restore iPhone." Next, a file browser menu will appear — use this to find and select the IPSW file that you downloaded in Step 2. Once you've done that, click "Open." After a few seconds, you'll see a popup informing you that iTunes will now install iOS 10.3.3 on your device. Click "Restore" here, then sit back and wait, because the process of installing the older firmware will take up to 30 minutes. Along the way, you may be prompted to enter your PIN on your device, so make sure to do that if asked. Once iTunes has finished installing the older firmware, your device will automatically reboot. When that happens, go ahead and disconnect your phone from your computer.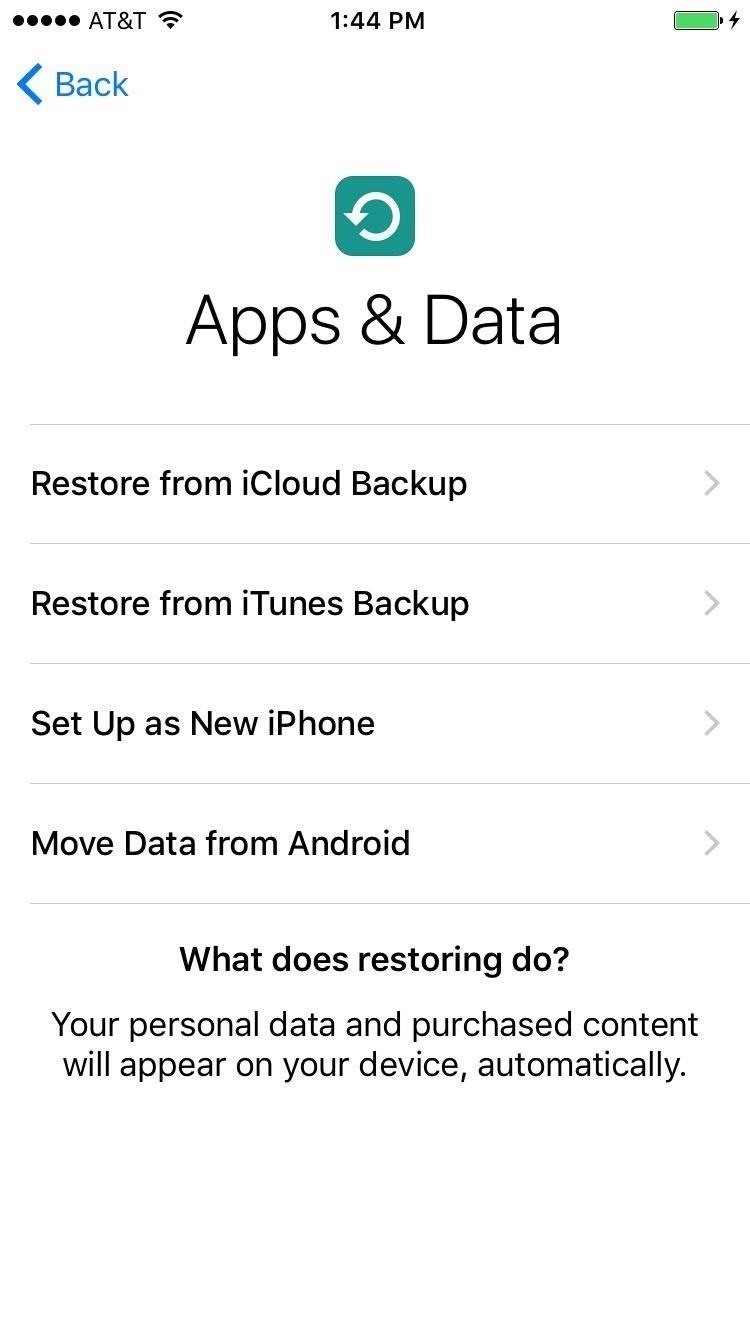
Step 6: Restore Data from iCloudOnce the process has finished, run through initial setup on your iPhone, then select "Set Up as New" if you want a fresh start, or "Restore from iCloud Backup" if you want to get all your apps and data back. If going with the latter, just sign in with your Apple ID, then select the most recent iOS 10.3.3 backup, and your apps and data will be restored. You can also choose "Restore from iTunes Backup" instead if you archived iOS 10.3.3 before installing iOS 11. At this point, you should be back to the comfy confines of iOS 10.3.3. But if you're having any trouble with the above downgrading method, let us know in the comment section below and we'll try to steer you in the right direction.Don't Miss: 91 New Features You're Missing Out on If You Don't Upgrade to iOS 11Follow Gadget Hacks on Facebook, Twitter, Google+, YouTube, and Instagram Follow WonderHowTo on Facebook, Twitter, Pinterest, and Google+
Cover image and screenshots by Dallas Thomas/Gadget Hacks
Our Samsung Galaxy S8 vs LG G6 comparison is here, to give you all the info you need to help you decide which South Korean phone maker's new handset is best for you in 2017.. Sure, they look
LG G7 ThinQ vs Samsung Galaxy S9 | TechRadar
If you ever need help troubleshooting an issue that you're having with your Android device, one of the most useful tools you have available to you is the screenshot. Essentially, this is an exact copy of everything that is showing on your screen at any point in time, which you could use to capture
Logical test - IQ - Apps on Google Play
In this procedure, we'll show you how to flash a custom recovery on your Samsung Galaxy Note 3 (AT&T). After flashing a custom recovery on Samsung Galaxy Note 3 (AT&T), you'll be able to: Perform full backups of your device (literally save EVERYTHING from it). Increase your device's performance (after flashing something called a kernel
How to Unlock the Bootloader, Install a Custom Recovery
Google can search almost anything on the web. This includes content that may be deemed unsuitable for younger members of your household. If you don't want to have pornographic websites or any sexually explicit results come up on your web searches, you can opt to block porn from Google.
How to Block Useless Websites from your Google Search Results
Wet iPhone | Phone in Rice Method - How Your World Works
It is recommend that you solder this project, but initially, it's easier to make it and test it out using alligator clip leads. Remove the batteries from the laser. Connect the external battery pack to the laser's power contacts with 2 alligator clips. Usually you'll connect one lead to the battery case and the other to the spring inside.
How to Make a Simple Laser Communicator Circuit | Homemade
How To: Never Forget Your Grocery List Again — Make Google Home Remind You When You're at the Store How To: Create Collaborative Reminders on Your iPhone or iPad How To: Create Google Now Reminders Straight from Google Search on Your Computer
Add reminders in Google Calendar - Computer - Calendar Help
Let see how to turn off ambient display on Pixel 2 and Pixel 2 XL. This ambient display is not same as Pixel 2 always-on display. You can use Pixel 2 double tap to check phone feature to wake up screen with notifications with app icons. Also turn on lift your phone feature on Pixel 2 and Pixel 2 XL to show ambient display when lift your phone
Showing What Ambient Display is for the Pixel and Pixel XL
Changing an app's name on your home screen is not something you can do on stock Android or TouchWiz, but it should be. If you think of it merely from a customization angle, sure, it's not a big deal, but having the ability to alter an app shortcut's name can do wonders for cleanliness and being able to distinguish from similar icons.
Find og udryd Android Apps, der ondskabsfuldt sporer dig på
You can change the look and feel of your Android phone to something more Microsoft friendly. Learn how to set up, customize, and use Microsoft Launcher.
How to Transform Your Android to the Windows Phone 8 Look
15 Black Friday deals on accessories for all of your new Apple products All the best Black Friday 2018 It also comes armed with a Qi-certified wireless charger and a 5,000mAh battery which
The best Black Friday phone deals of 2018: iPhone XS, Samsung
Add a Power Menu to Your iPhone for Quick Reboots, Resprings
Recently, Adobe has lifted the support of Flash from the Android Jelly to later versions. But there is a way out to install and use Flash Player on Android Jelly Bean as well as KitKat, Lollipop and Oreo. Flash Player is generally used for accessing the flash content such as online TV shows, gaming, videos and other multimedia purposes. So, it
Make Flash Player Work on Android 5.0 Lollipop - groovyPost
This tutorial discusses how to group Live Tiles in Windows 10.The introduction of Windows 8 marked the beginning of an entirely new and radically different UI design philosophy for the Windows line of Operating Systems.
How to Tweak Your Tiles in Windows 10 | PCMag.com
Find files you've downloaded on your PC. Download Manager keeps track of pictures, documents, and other files you download from the web. Files you've downloaded are automatically saved in the Downloads folder. This folder is usually located on the drive where Windows is installed (for example, C:\users\your name\downloads).
Change default program for a download - Microsoft Community
0 comments:
Post a Comment