Snapseed 101: Use Portrait Mode & Head Pose to Get the Perfect Selfie
Google's Snapseed app has a plethora of editing tools to help make your photos even better. But did you know it has specific tools designed to edit your face? Not that it needs any help, of course!While there are many Snapseed tools that help improve your selfie game, only two are specifically designed to focus on the most important part of your selfie. Those tools, Portrait Mode and Head Pose, can be used to improve your selfie game in ways your automatic iPhone or Android camera just can't do. If you've ever wanted to take your self portraits from amateur to professional, check out the guide below.Don't Miss: Snapseed 101 — How to Import Your Photos for Editing
Taking Your SelfieSelfies are now a kind of art form, and, like any art form, practice makes perfect. You might want to practice for yourself first before applying some edits in an app like Snapseed.If you've never taken a selfie before, or would just like some advice to improve, check out our list of tips and tricks below:Don't Miss: 9 Tips for Taking the Perfect #Selfie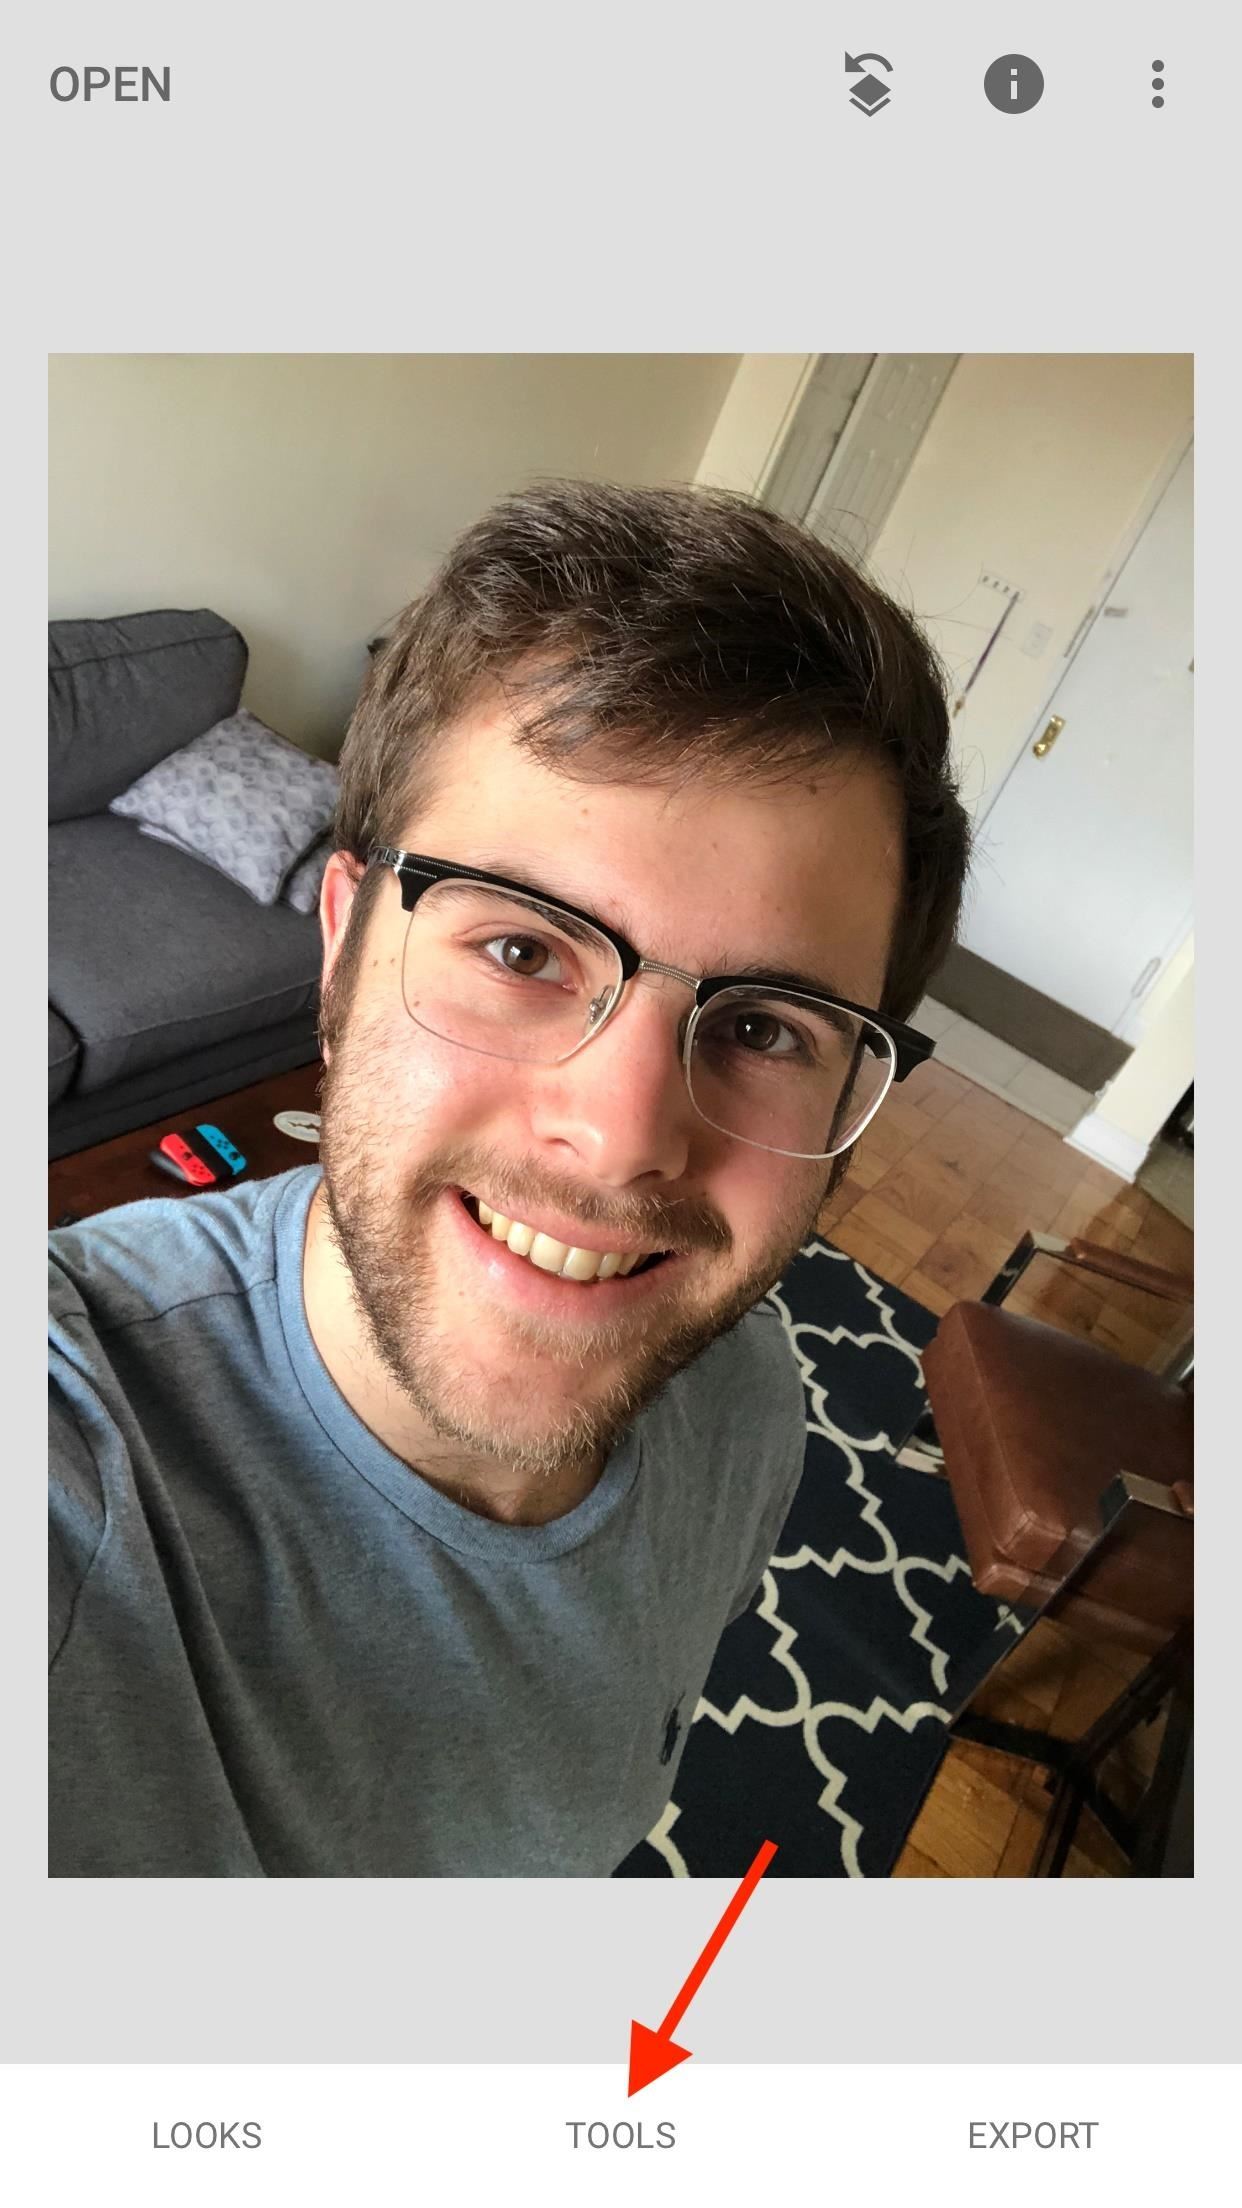
PortraitThe portrait tool gives you the ability to enhance your selfies with smart, automatic filters and effects.To begin, tap "Open" in the top right corner of the display. Select your selfie, or take one of your own by tapping "Camera." (Refer to the above instructions for how to take your selfie).Once your selfie is loaded into the viewer, tap "Tools" at the bottom of the display. Don't be overwhelmed by the, um, overwhelming number of items here. Just tap "Portrait" in the last row. After your iPhone or Android scans the photo, you'll be ready to go.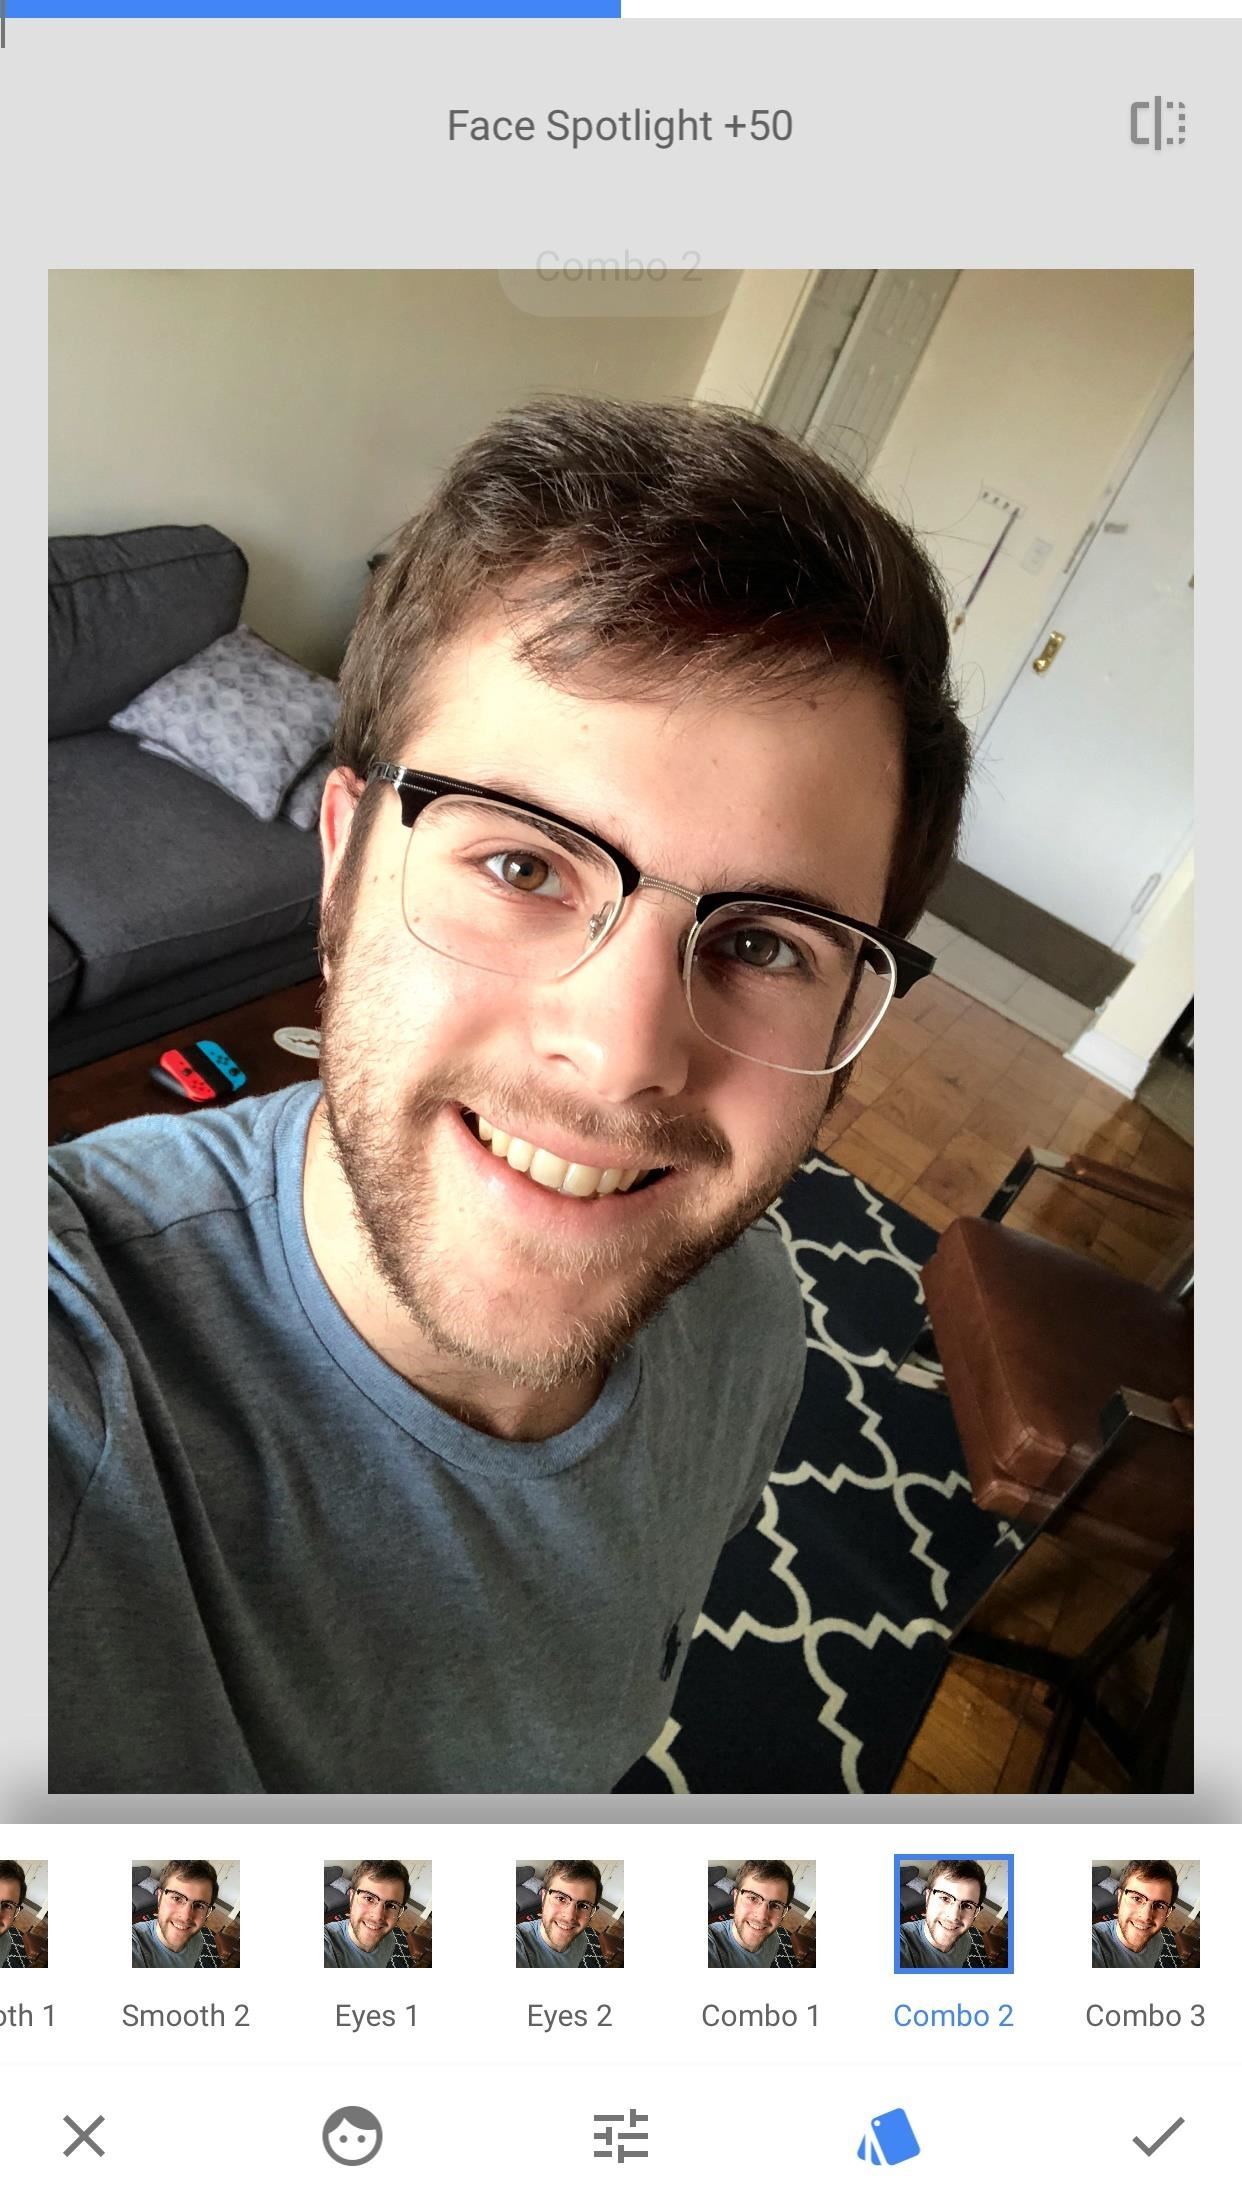
FiltersSnapseed, by default, starts you off with filters. These are fully automatic settings, similar to what you might find in Instagram or even in iOS 11, that change the look of your face. Some filters target your eyes, while others tackle your entire selfie. Some brighten your look, while others darken. You'll have to play around with each in order to see which matches your style best.While these settings are automatic, Snapseed gives you the option to apply additional edits to the photo from here. But more on that later ...To see how any filter compares to your original selfie, tap the button in the top right corner of the display. Now, the next two settings to play with are much more flexible. In fact, they allow you to mess with each filter's unique makeup.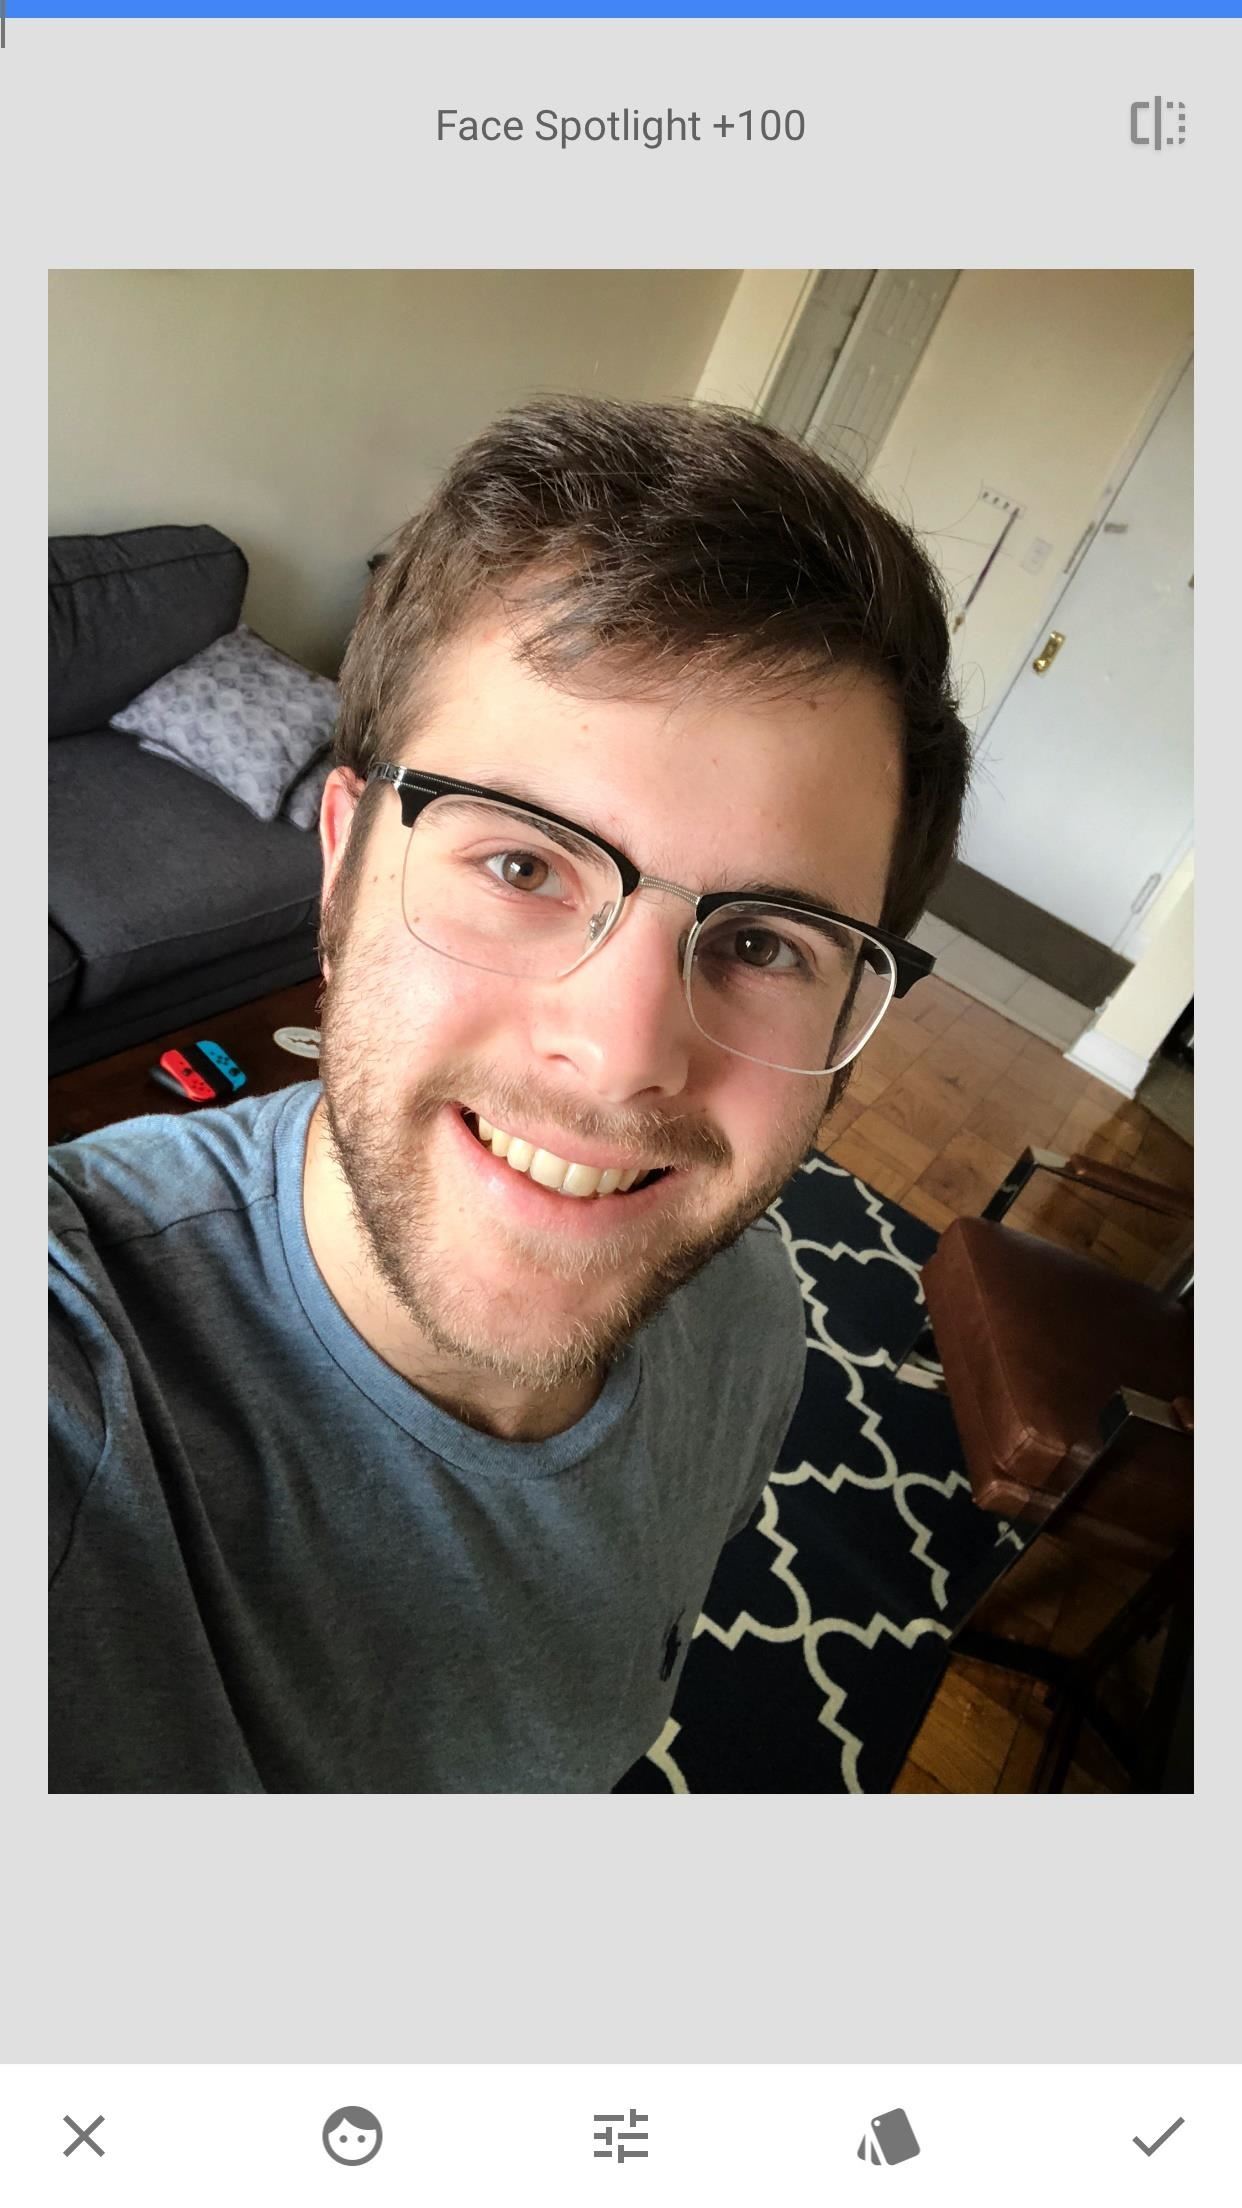
Additional AdjustmentsThis section is to the left of the filters tab. It allows you to adjust three settings that dictate the look of each filter — "Face Spotlight," "Skin Smoothing," and "Eye Clarity."Face Spotlight controls the amount of light added to your face. You may notice the background brightness of the image change with your edits, however, the most dramatic effects take place on your face.Skin Smoothing brushes over the minute details of your face, giving you a more consistent, "smooth" look. Apply this one carefully — too much Skin Smoothing, and you start to look a bit "smoothed-over."Eye Clarity brightens up the eyes in your selfie, which can be helpful for accentuation. However, like with Skin Smoothing, too much Eye Clarity may make your selfie look a bit ... odd. You probably want to look more enhanced, rather than abnormal. Editing with these tools is simple — just slide your finger horizontally across your selfie. You can see how much you have applied the edit on a scale of 0–100 at the top of the display. You can also pinch to zoom into your picture to really see how your edits are affecting the look of your portrait.However, what's really cool about this feature is you don't need to be in this tab to make these adjustments. If you're back in the filters tab, simply swipe up or down to choose from any of the three options, then, swipe left and right to apply that edit.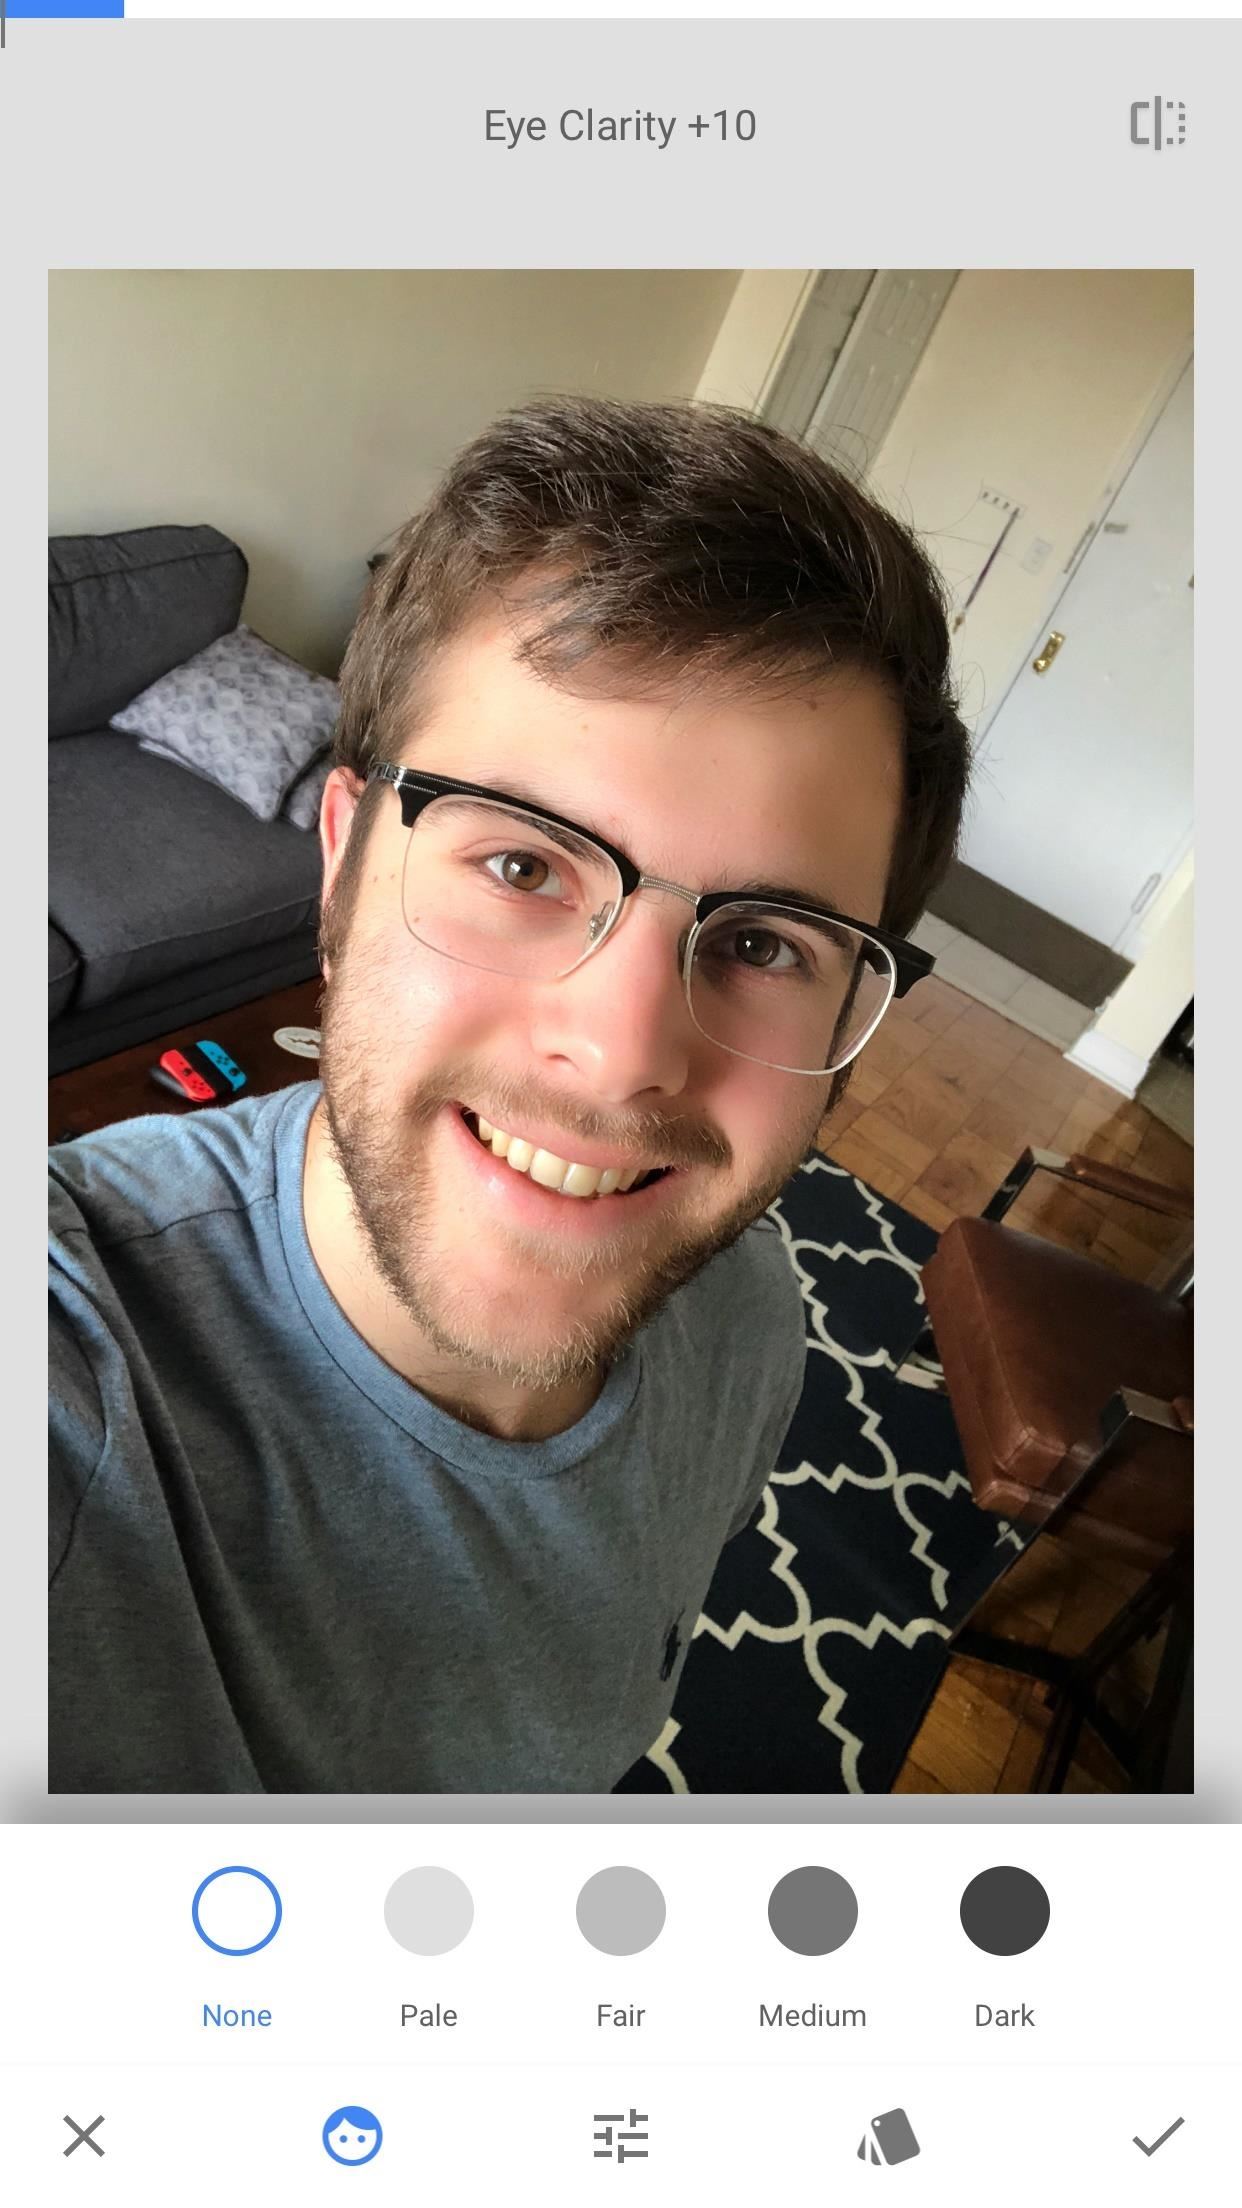
Skin BrightnessThis section allows you to choose how bright your skin appears in your selfie. You can choose from five options, ranging from none, pale, fair, medium, or dark. If you've chosen a filter already, one of these options may have already been chosen as part of that filter. Tap on any other to see how it affects your filter.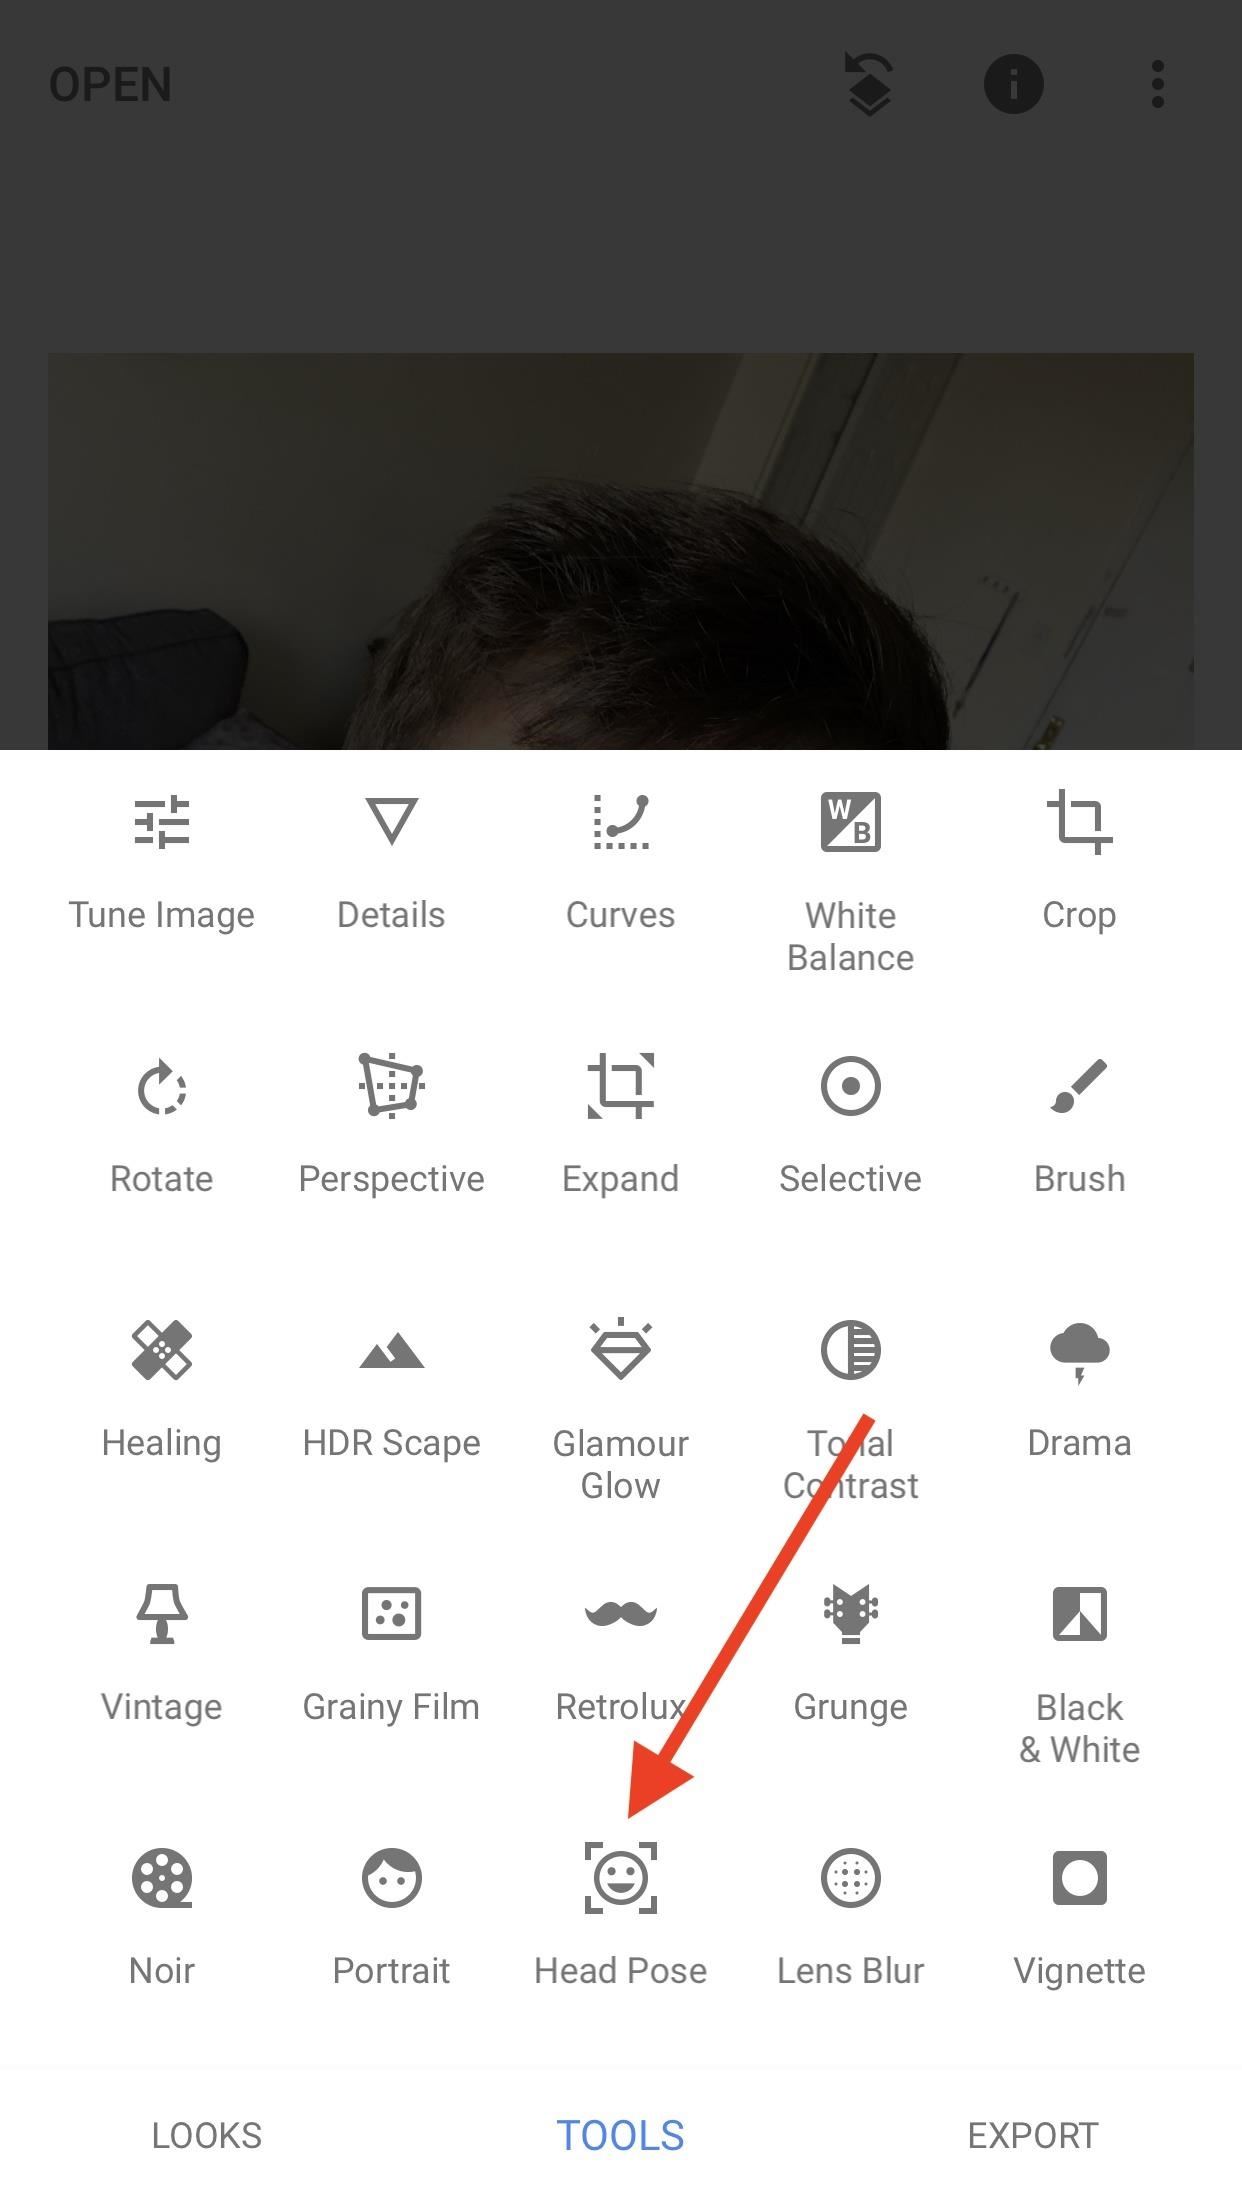
Head PoseFirst, a disclaimer — this tool can easily do nothing but make your selfie look anyway from ridiculous to downright creepy. It should be used mildly for best results, especially since the technology, while impressive, still needs some work.The idea behind this interesting effect is to adjust physical features of your face — specifically, your head position — in order to craft the look you have in your mind.When first launched, Head Pose is activated by default. Simply drag your finger around the display, and your face will move with you, although probably not as far. Again, you can zoom in to make fine adjustments, although I found it really wasn't useful for this setting. You don't quite get the full effect unless you can see the entire picture.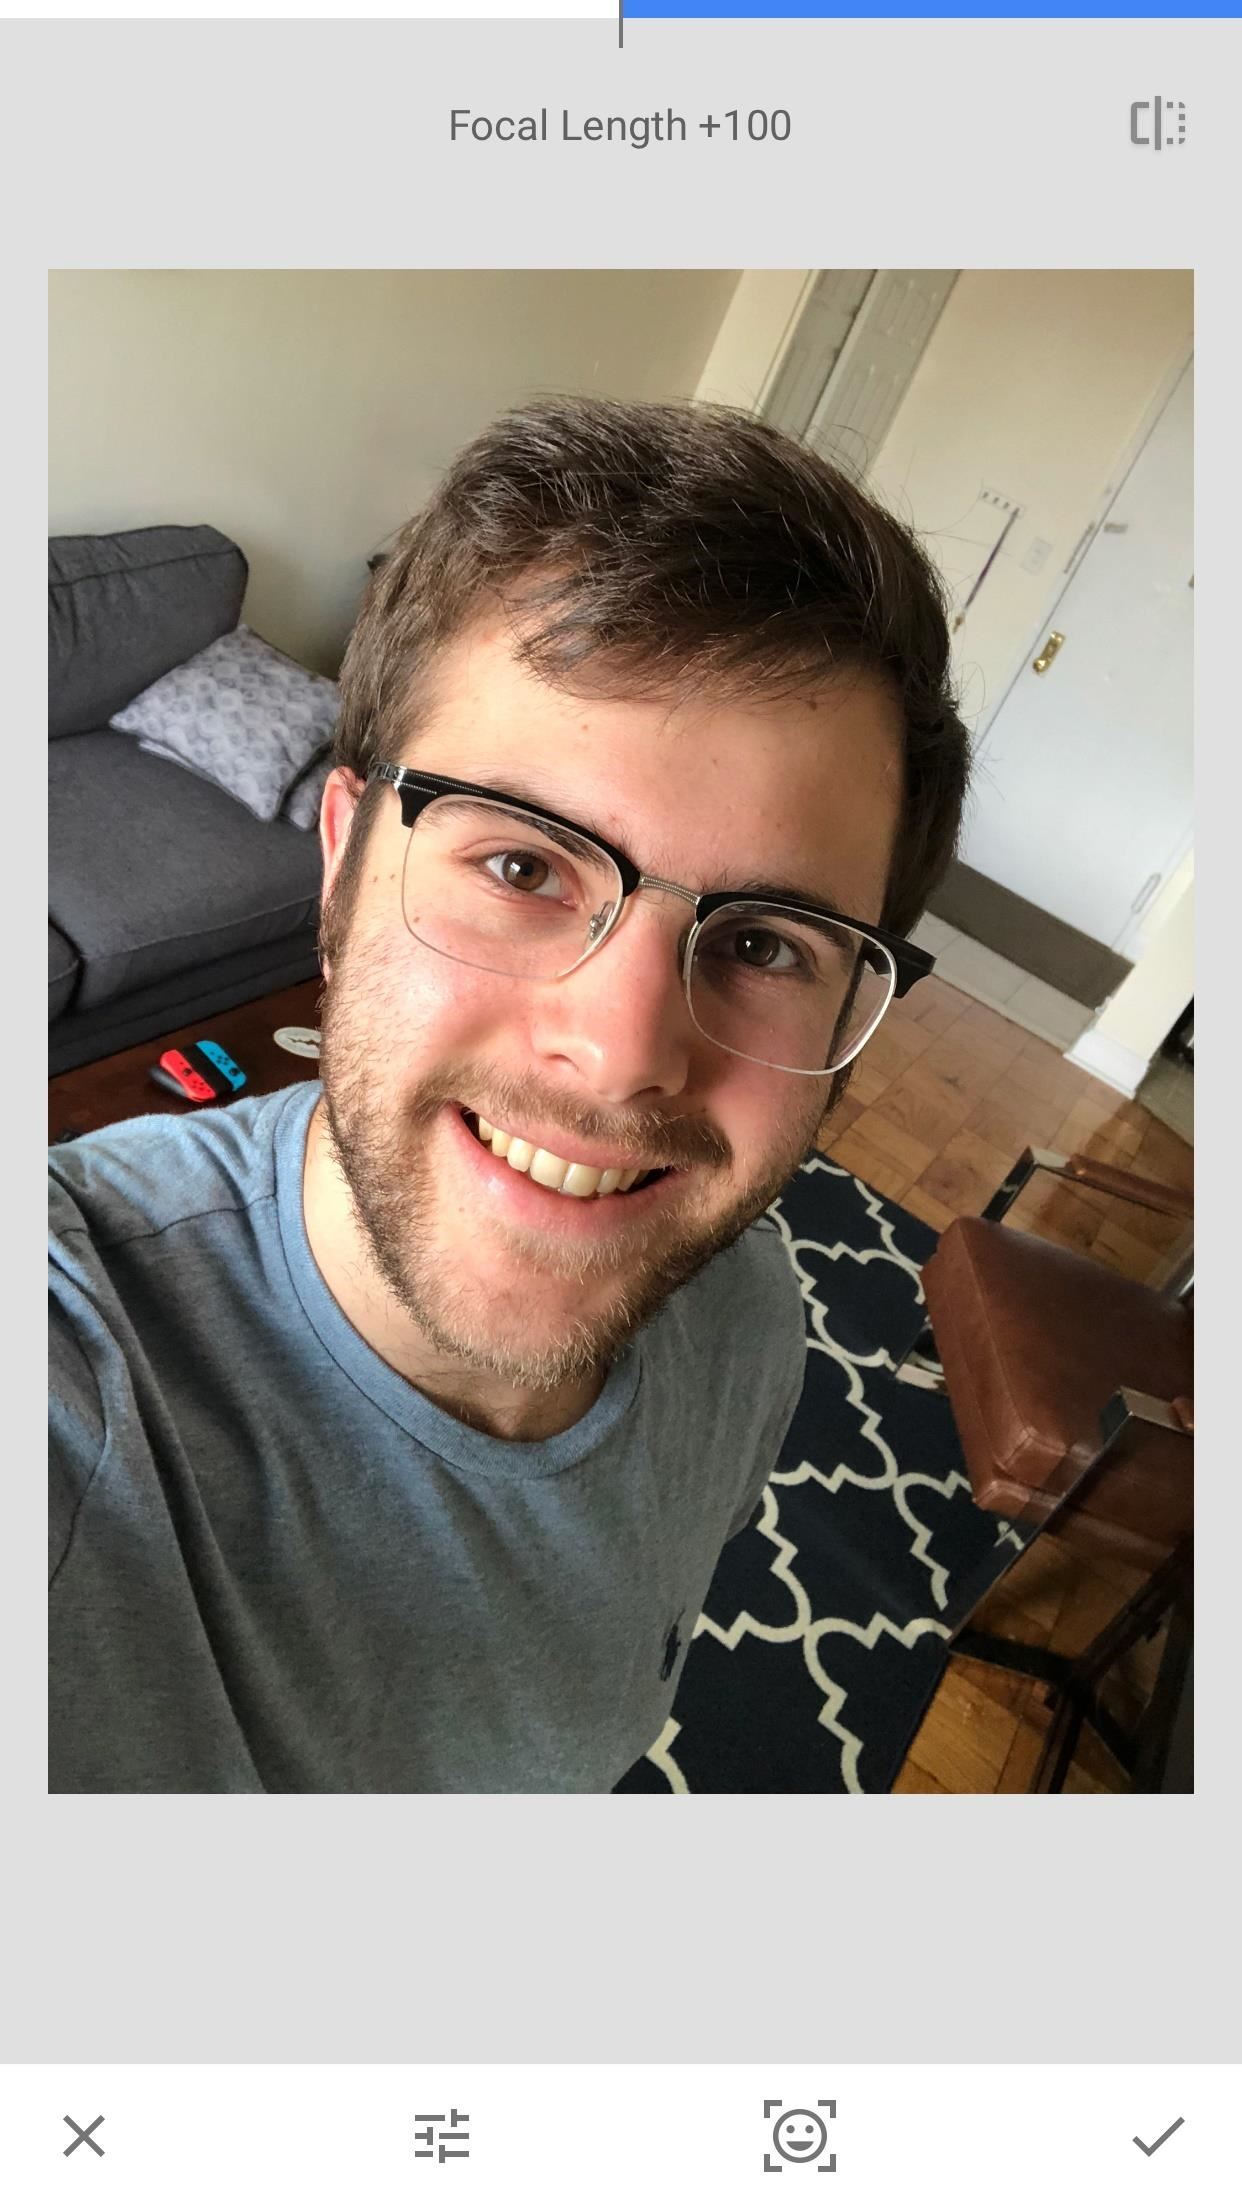
Additional AdjustmentsJust as with Portrait, Head Pose has additional adjustments for you to make. You can either tap the tab next to the Head Pose tab at the bottom of the display to reach these adjustments, or, like in Portrait, you can swipe up and down to activate them. Keep in mind you need to deactivate Head Pose first by tapping on its tab. Just make sure its grey, and you'll be all set.Your options here are different from Portrait, however. You can adjust Pupil Size, Smile, and Focal Length.Don't Miss: How to Use the 'Healing' Tool to Remove Unwanted Elements from a PhotoPupil Size does indeed increase your pupil size, however, it also increases the size of the rest of your eye. Better use the zoom feature on this one, though.Smile allows you to turn that frown upside-down, or turn your smile into a frown, if you'd like. It's ... interesting, to say the least.Finaly, Focal Length adjusts your face's "distance" to the camera, by either inverting your face to appear further away, or bulging it out to appear closer. It sounds a bit odd, but, in moderation, might aid some people's selfies.So, what does that all add up to? I think my results speak for themselves: (1) Before. (2) After. So, how did your selfies turn out? Did Portrait Mode and Head Pose help you? Let us know in the comments below!Don't Miss: How to Blur NSFW Images with Snapseed to Share on Social MediaFollow Gadget Hacks on Facebook, Twitter, Google+, YouTube, and Instagram Follow WonderHowTo on Facebook, Twitter, Pinterest, and Google+
Cover image and screenshots by Jake Peterson/Gadget Hacks
The circular polarizer of the pixel attempts to solve this problem. We could not test the smaller pixel 3 to see if it has the same circular polarizer, but we will update this article as soon as we know one way or the other. From our previous tests, the blue shift problem on the Pixel 3 XL seems to have improved.
Google Pixel Tips, Tricks & News « Android :: Gadget Hacks
Furby will start to dance and sing a lullaby. If you have a certain kind of remote, you can make Furby do things by pressing different buttons! Like if you press the power button he will fall asleep immediately! WoW! (Unconfirmed) If you pet a Furby 10 times in a row he will sing for you! If you reset your Furby 2 times or more, it might speak
Push-Start a Comatose Furby: 13 Steps (with Pictures)
How To: Hack Your Nexus 7 into a Hybrid Android Tablet That Looks & Feels Like Both iOS & TouchWiz How To: Easily Root Your Nexus 7 Tablet Running Android 4.3 Jelly Bean (Windows Guide) How To: Improve Battery Life on Your Nexus 7 Tablet with This Easy Power-Saving Tweak
How to Add On-Screen Buttons to Your TouchWiz ROM (Root Required)
Greenify is a terrific app that allows you to put battery-hogging apps into "hibernation." Effectively closing the problematic apps and preventing them from running until you explicitly launch one of them, hibernation is a great way to save battery life while you're not using your phone.
Automatically Hibernate Apps for Better Battery Life with
- Wait for the app to detect your device and to download the OS for your device. - Once the necessary files are downloaded press the Install button to start the installation process. - Once the installation process is completed your device will boot into Android Cyanogen Mod.
How to Install CyanogenMod on the HTC One Even Faster Now
Prepare yourself for over 60 Unique 3D Worlds including Donkey Kong Country and Bonus Levels. Choose from 5 different Pacman &\; Miss-Pacman Software Terms: Load Runner The Legend Returns, Deluxe Pacman, Delux Pacman Game, Download Delux Pacman Game, Windows Vista Software Pacman
Amazon.com: Fire TV Apps (All Models): Apps & Games
Monitor a iPhone 6 for Free With Gps Online; 23 RatingsThe spy software utilizes the IMEI number monitor a iphone 6 for free with gps online of track the metro pcs track my android phone activity on a mobile device.
How to see if the exact iPhone 7 model you want is in stock
14 Things You Should Know Before You Go Skydiving For The First Time As explained by someone who is terrified by heights but survived — and even loved! — his skydiving experience. Posted on
How To: Install CyanogenMod 10.2 on Your Nexus 7 for a More Mod-Friendly Stock 4.3 Experience How To : Hack Your Nexus 7 into a Hybrid Android Tablet That Looks & Feels Like Both iOS & TouchWiz
While We Wait on LineageOS, You Can Still Install CyanogenMod
How To Record ANY Android Device Screen 4.2.2, 4.3, 4.4 Jelly Bean, Kit Kat, Ice Cream Sandwich - Duration: 1:53. SMASHING GEEK 92,392 views
5 best Android apps for screen recording and other ways too
Since any machine translation is going to be somewhat inaccurate, it would be ideal to find an option in the site to show the English version. Can you see anything like that on the page you are viewing? If not Firefox does not have translation built-in, although it is under consideration for a future version.
How to Translate Webpages in Safari on Your iPhone « iOS
0 comments:
Post a Comment