News: 10 Photography Tips for Mastering Your Camera Phone
If you're always taking blurry and underexposed pics with your mobile device, try using some of the tips below to turn your phone into a valuable photography asset. It doesn't matter if you have an iPhone, Android smartphone, or even a first-gen camera phone... you can still take some beautiful, winning photographs.
Step 1: Up the ResolutionThe higher the resolution, the better. If you have a newer smartphone with a higher quality lens, you're in good shape. But you can still take good pictures on a lesser quality one.Most camera phones have a low, medium and high resolution setting (picture quality), so no matter what device you have, make sure the camera is set to the highest resolution possible, otherwise you'll lose some detail and come out with a muddy image. You may not be able to tell the difference on the phone's display, but you'll definitely see the improvements on a computer screen. Taken with a Sony Ericsson K610i. Image by Marco Welt/Flickr
Step 2: Take More PicturesProfessionals may want to get it right on the first try, but a camera as mobile as the one on your phone allows you to grab life's moments of spontaneity, which means you might not have time to set up the shot perfectly. Taking as many pictures as you can will give you a better chance of coming out with a usable one you're proud of. Taken with a BlackBerry. Image by Curtis Gaston/National Geographic Plus, it gives you a chance to experiment. Try new angles and different perspectives—try shooting down low, up high, close and far away, tilted, etc. Taken with an unknown camera phone. Image via Kodak
Step 3: Perfect the LightingSunlight can be your friend and your enemy. Having a little sun shine down on your subject could illuminate it enough for a perfectly exposed picture, but having a sunbeam hit your model in the face isn't very attractive. An overcast day is perfect for a cool and happy image. But if the sun's shining bright, place your subject in the the brightest shade possible—you don't want them in direct light or complete darkness. If shooting indoors, have the windows open or the lights on.In low light situations, your images will appear dark and grainy, so take advantage of your phone's built-in flash (if it has one). You can also use your flash as a fill light in other lighting situations. Taken with an iPhone. Image via Accusmart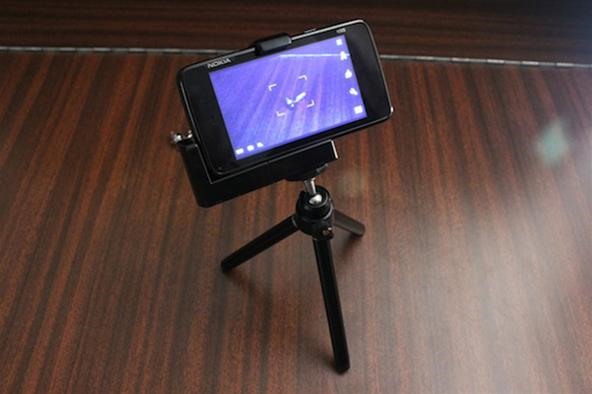
Step 4: Stabilize Your PhoneTo get the cleanest image possible from your camera phone, stabilize it. Jittery hands cause blurring. And in low light situations, camera phones tend to slow down the shutter speed to let more light in, which means you have a longer opportunity to capture the moment. Obviously, a tripod would do wonders, but if you don't have one accessible (since it is a mobile phone), use both hands to keep it steady. Also, brace your upper arms against your body for more support. Tripod for mobile phones. Image via Handheld Blog Also, don't be a victim of shutter lag. Don't move your device after hitting the capture button... give it a few seconds to process to make sure it captures the picture before you move. And make sure you figure out the timing, so when something interesting happens, you'll have a good idea of when to point and press the shutter release.
Step 5: Get CloseA lot of the time, the subject in a camera phone picture ends up being a tiny speck in the far distance. Most camera phones do not have a zoom function. If they do, it's digital zoom and quality lessens when using it. So, make sure to fill your phone's display with your subject matter so you can get all of the pretty details. But don't get too close unless you have a macro option, or your phone will have a hard time focusing and the pics will turn out blurry and distorted.For tips on some cheap macro photography techniques, click here. Taken with a Samsung Fascinate. Image via Kevin A Kierstead Taken with an iPhone. Image by Niels Sangmager/Flickr
Step 6: Shoot During "Magic Hour"Magic hour pertains more to cinematography, whereas photographers know that special time of the day as golden hour—the first and last hour of sunlight during the day. The effect is always stunning and somewhat dreamy because of the colorful sky, and there's just enough light left to have good exposure. Taken with a Sony Ericsson K510i. Image by BarboraH/Flickr
Step 7: Practice the Rule of ThirdsIt's a basic photography rule, so make sure you have it down. Having your subject directly in the middle creates flat and boring photos. Using the rule of thirds will help bring life to your photos. When composing your picture, imagine two horizontal lines splitting the frame into three equal parts. Then imagine the same thing with two vertical lines, so you have a nine-square grid. Place your horizon and other such fillers on the grid lines, leaving the intersecting points for the interesting subject matter. Taken with an HTC EVO 4G. Image by Keoni Cabral/Flickr Of course, once you have this down... it's time to break the rules! Taken with a Sony Ericsson Satio. Image via Xell
Step 8: Use Motion to Your AdvantageThe technique is called panning, and it's a hard one to implement on camera phones, but not impossible. To take some really cool panning photos, grip the camera securely with both hands for steadiness, and frame the moving subject matter on the LCD display. Then move the camera at a similar speed as the subject, causing the moving subject to appear still, while the background is blurred in motion. Taken with an unknown camera phone. Image by Amy-Mae Elliott/Mashable
Step 9: Get the Right ColorsPlay around with the colors in front of you. The world's a vibrant place, and the second best place to see the beautiful colors besides the real world is in a photograph. Check out some of these bright and stunning captures. Taken with a Casio G'zOne Brigade. Image by Andrew McGregor/Flickr Taken with an HTC T-Mobile myTouch 3G. Image by Sara Montour/Flickr Taken with an iPhone 4. Image by Valduur/Flickr But sometimes a richly textured photo could be too much for the eye, making it a perfect choice for the monotone option in your phone's settings (if there is one). Plus, it gives you the chance to develop your photographer's eye, letting you concentrate on the relationship between light and shadow, without having a bunch of distracting colors. Taken with an iPhone. Image by Simon Marussi/Flickr Taken with an iPhone. Image by Toalston/Flickr Taken with an unknown camera phone. Image by Mark Johnston/National Geographic Also, be sure to experiment with white balance if you camera phone offers the option.
Step 10: Use Some Cool FiltersWhen your creativity has failed you, get help from others! More specifically... apps. There's tons of cool mobile filter apps that can add some zest to your photos, either during the picture or after. There's FX Photo Studio, Hipstamatic and Camera Plus Pro, to name a few. Most cost a small sum of cash, but what's a buck or two compared to an interesting pic? Taken with an iPhone using the Hipstagram app. Image by Sibokk/Flickr Taken with the HTC EVO 4G using the Vignette Android app. Image by 99%: "Meh"/Flickr Taken with an iPhone 3GS. Image by what it do lips/Flickr Taken with an iPhone using the Lomo app. Image by Naenzieh/Flickr Taken with an iPhone. Image by Simon Marussi/Flickr Now... go out and take some great photos and share them in the comments below!
Cover image via CarbonNYC/Flickr
If you bought the new iPhone 5 or upgraded your old one to iOS 6, you may be having issues when you try to upload photos to Facebook. After updating, the first time you try to share an image from the Facebook app, it will ask you to allow access to your Camera Roll. If you're like me, your first
Troubleshooting | Facebook Help Center | Facebook
How to Enable Intelligent Scan. When you first set up your Galaxy S9, you'll be prompted to setup Intelligent Scan automatically. Just follow the prompts to scan your face and irises and enter a backup PIN, password, or pattern when asked.
3 Ways to Unlock Samsung: SIM Network Unlock Pin- dr.fone
DFU mode can help you get your phone back into working order, putting your iPhone into a state where it can still communicate with iTunes on Windows or Mac and be restored, but it won't trip the boot loader or iOS, in case your software has become royally borked.
How to put an iPhone in DFU mode - Macworld UK
Want to know how to reduce your data usage? We've taken a look at the data, and come up with some easy tips to save on data and money. tailored way of tracking data usage on your iPhone or
How to manage and control cellular data usage on your iPhone
How to change the font size on your iPhone and enable bold
Brian Lang's Latest Posts. News: Try These 5 Hot New Snapchat Lenses — The Simpsons, Playable Flappy Bird & More
News: Pinterest Updates Creepy Lens Feature, Now Recognizes
How to fix and repair the LCD screen on the HTC Touch. Start by removing the back cover and the battery. Use a t5 torx screwdriver to remove the 4 screws on the back of the phone. Once the screws are removed remove the the back plate of the phone using a pry tool to release the clips. Then use your fingers to pull it apart.
HTC Touch LCD Screen Replacement How-To Fix & Repair Video
2) Under the Account Preferences section click Delete your account or services. 3) From here, you have two options: Delete products (such as Gmail, YouTube, etc.) or Delete Google Account & Data. Since this is a guide on how to delete everything from Google, we'll select Delete Google Account & Data. 4) Google will ask you to re-enter your
How to Delete Activity History of Your Google Account on Android
When you do so, an album named Instagram Photos is created in your Facebook's Photos page where you can place all other images that you want to share from Instagram. Here is how you can link your Instagram and Facebook accounts: Press the Sleep/Wake button to switch on your iPhone.
How to Invite Your Facebook Friend to Join Instagram
Add a Smart App Drawer to Any Launcher & Get Automatic
How To: Get the Galaxy S8's New Weather Widget on Older Galaxy Phones Galaxy S8 Oreo Update: Lock Screen Clock Now Matches Wallpaper Color How To: Speed Up the TouchWiz Launcher on Your Samsung Galaxy S5 How To: Run MIUI's Apps & Launcher on Your Galaxy Note 2 Without Rooting
0 comments:
Post a Comment