How To: Make Custom Text Tones for Your iPhone Using iTunes
Your iPhone comes packed with a long list of excellent text tones to choose from. Bamboo anyone? Of course, for some of us, stock sounds from 2013 don't cut it anymore. We want customizability, something that's found more on Android than iOS. However, you can add your very own text tones to your iPhone right now, so long as you have a sound file in mind and a computer running iTunes.Text tones aren't the only sounds you can customize on your iPhone, though. You can even create custom ringtones for phone calls, alarms — anything you can think of that could use a longer tone. We'll focus on text tones here, sounds that you'd normally expect to last just a couple seconds at the most, but check out our ringtones guide if you're interested in learning custom ringtones.More Info: How to Make Custom Ringtones for Your iPhone From Any Song
Step 1: Add Your Sound File to iTunesWhether you want to use a small clip from a song for your tone or you have a killer sound you'd like to use instead, you'll want to make sure to add the file to iTunes before starting. To do so, take the sound file and drag and drop it over to your iTunes window. The file will automatically import, ready to begin the text tone process.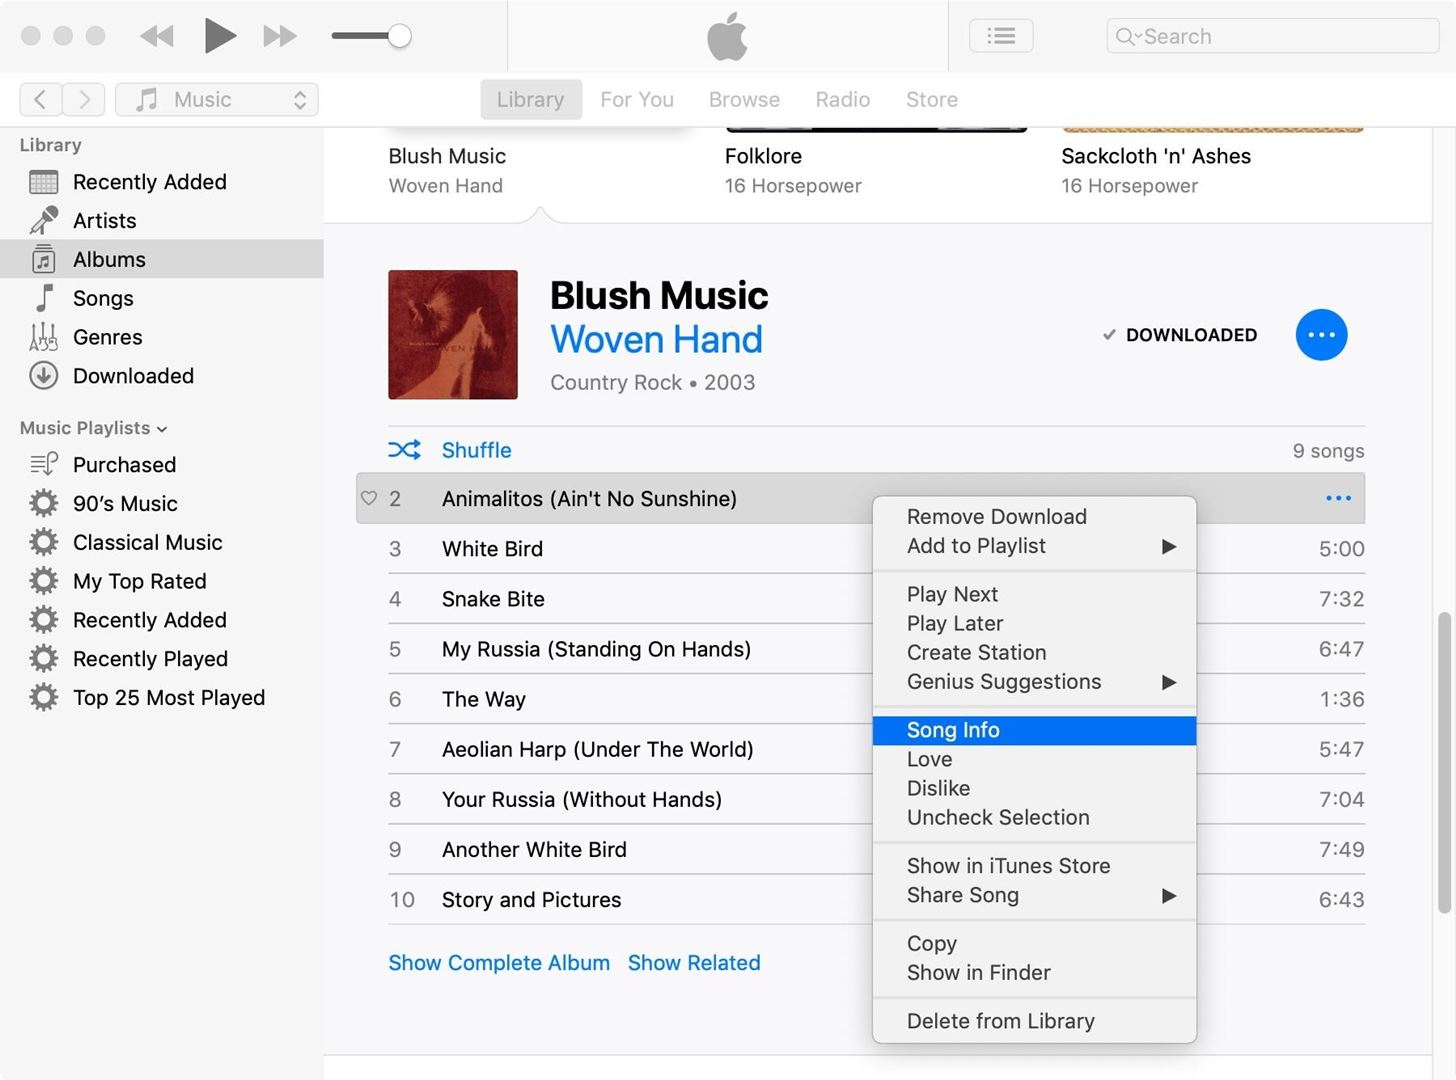
Step 2: Set Time Parameters (If Applicable)Text tones are meant to be as short as possible — most of us don't want ringtone-length alerts playing every time we receive a text! As such, if you want to use a small portion of a song as your text tone, you won't just want to upload the entire thing as a text tone.To help us here, iTunes allows you to set time parameters for songs — this gives you control over what portion of a song is able to play. While iOS supports tones as long as 40 seconds, for text tones, you might want to keep this parameter down to as little as one second. This is totally up to you, and you can repeat the process to experiment with as many time frames as you'd like.With your song in hand, highlight the track, then press Command-I (Control-I on Windows) to access the Song Info window (Get Info in previous versions of iTunes). Alternatively, you can select "Song Info" after right-clicking the song, clicking the ellipsis (•••), or clicking the "Edit" option in the menu bar. On this info page, click "Options." Take a look at the "start" and "stop" boxes. Here, you can enter the start time for your text tone, as well as the end time. If you're choosing any start or stop time other than the beginning or end of the song, make sure both checkboxes are marked. Leaving the start box unchecked will start the song at the beginning, and the stop box will let the song continue to the end, regardless of the time you've entered here.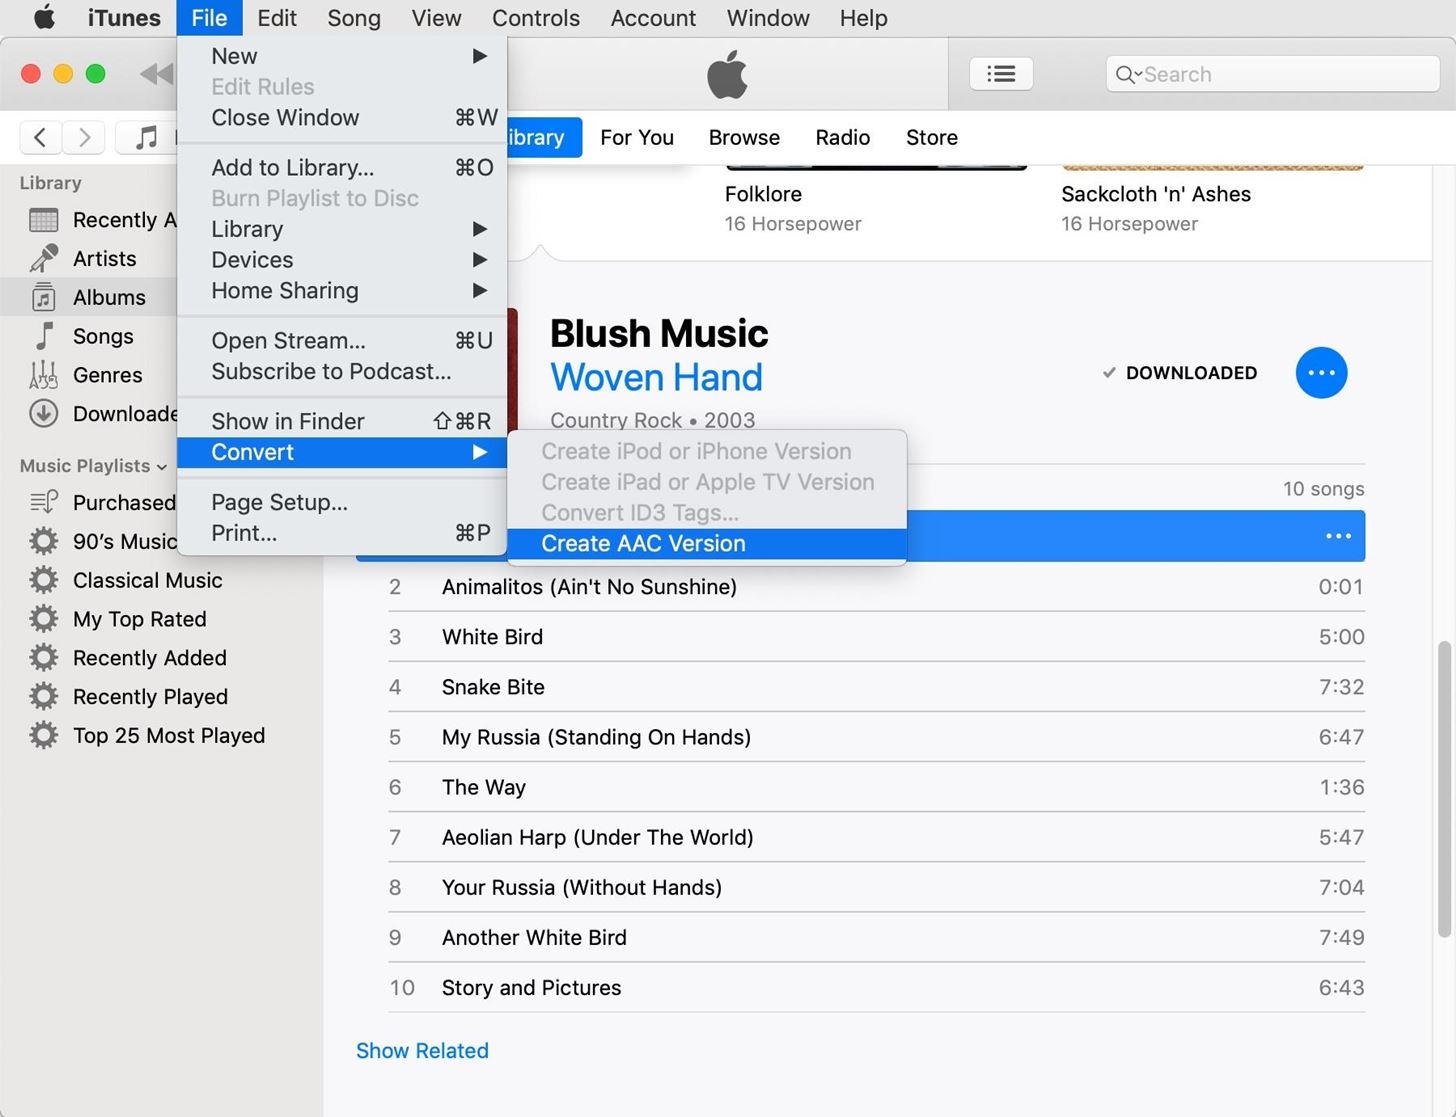
Step 3: Convert Your File to AACOnce your song or sound file is just the way you'd like it to be, you'll need to convert it to AAC, a file type with a higher-quality compression than MP3 but at the same bit rate. In short, it's a better file type and the kind you need in order to make a tone.However, you won't just be converting your file to AAC, you'll be making a copy, so you'll see two files in iTunes. If you're using a song with time parameters, your new copy will only be as long as your time limits. Instead of the full-length song, you'll see a new track listed at only one or two seconds (or however long you set the track to be).To begin converting, click "File" on the menu bar, then "Convert." Finally, select "Create AAC Version." Your file will be converted, spawning a new copy in AAC. Don't worry, the original file will remain untouched. You can delete that one from iTunes if you want or remove the start and stop times. If "Create AAC Version" doesn't show up as an option for you, your conversion settings are probably set differently than what they need to be. To change the settings, click "Preferences" in the menu bar, then click "Import Settings" in "General." Now, click "AAC Encoder" from the drop-down menu, click "OK," then "OK" once more to finish. Try converting the song now. Just make sure you have the option to convert to AAC.When "Create AAC Version" is greyed-out, however, that means your song is DRM-protected and cannot be used as a text tone.If using a song connected to an album, your AAC file should nestle itself directly underneath the original song. Random sound files, however, might make a duplicate outside of the original album. Just click "Recently Added" to make sure you're looking at the copied file. Before wrapping up here, make sure to go back to your original song file and reset the time parameters. Otherwise, you'll essentially hear your text tone every time you try to play the full song.
Step 4: Change Your File Type from M4A to M4RAAC isn't enough for iOS to register your file as a tone. Your text tone, which now reads as a .m4a file, needs to be converted further to .m4r. This file type is the standard for iOS tones.To convert your file to .m4r, drag and drop it to your desktop or right-click on the file in iTunes and select "Show in Finder." Either way, click the name of your file to access the name editor, then change its extension from .m4a or .m4r. While you're at it, change the song name to whatever you want your text tone to be called. Confirm the change on the popup, if one appears.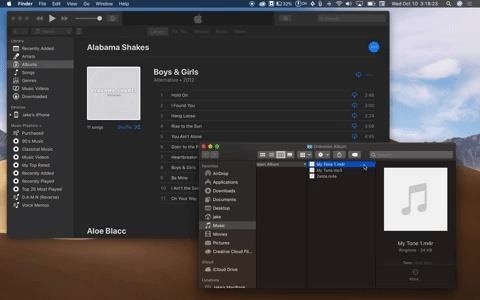
Step 5: Sync Your Text Tone to Your iPhoneThis step only works if you're running iTunes 12.7 or higher. Unfortunately, adding your new tone to your iPhone is trickier in older versions of iTunes. Skip to the next step if that applies to you. Check which version you're using by selecting "iTunes" in the menu bar, then clicking "About iTunes."On iTunes 12.7 or higher, plug your iPhone into your computer using a Lightning to USB or Lightning to USB-C cable, or, if syncing wirelessly, ensure your iPhone is on the same Wi-Fi network as your computer. You should find your iPhone in the sidebar on iTunes under "Devices."Finally, pick up the .m4r tone file you made and drop it onto your iPhone in iTunes. Your tone will then automatically sync with your iPhone and, when finished, will be accessible from your iPhone's settings. Skip to Step 9 to learn what you can do with it.Don't Miss: How to Save GarageBand Songs as Ringtones & Alert Tones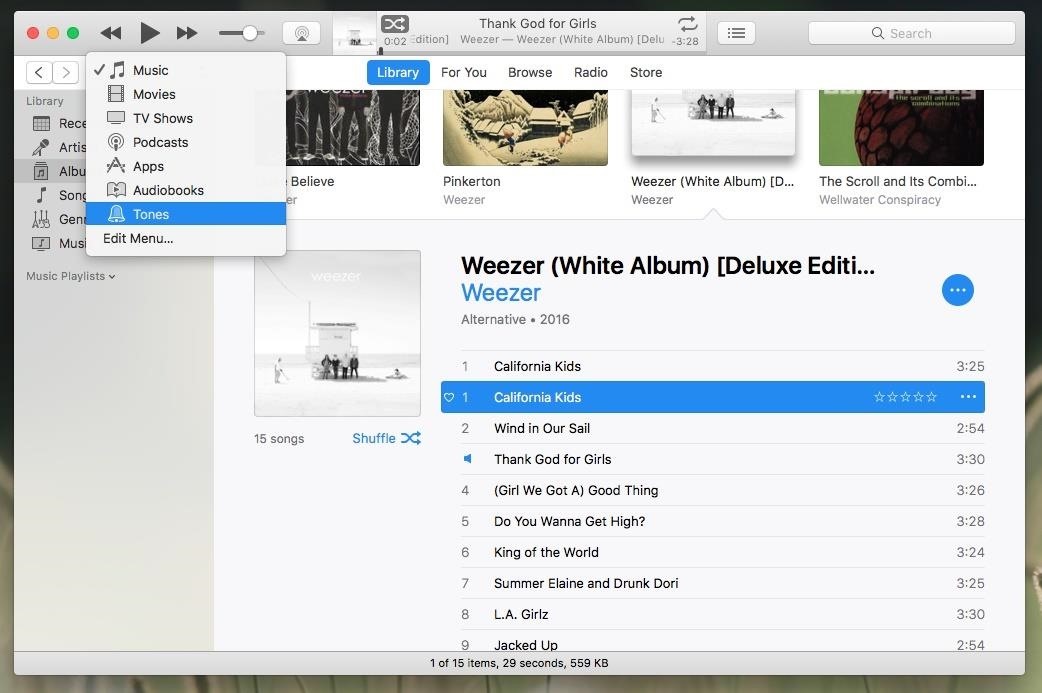
Step 6: Add the File to Tones (iTunes 12.6 & Under)As said above, if you're using iTunes 12.6 and under, this endeavor is a little more intensive. You won't be able to simply add your file directly to your iPhone, as these versions of iTunes have an individual "Tones" section. You have to place your tone here. Select "Music" in the top-left corner of the display, then click "Tones." If Tones doesn't appear, select "Edit Menu" then add it. If your tone is on your Desktop, just pick it up and place it back in the Tones section in iTunes. If you found it using "Show in Finder," just right-click on your tone, then select "Duplicate." Finally, drag and drop your file back to Tones.
Step 7: Clean Up Your iTunesYou don't want to leave behind the small mess you made in order to set yourself up for text tones. So, delete the duplicated shortened clip in the Music section, then go back to the original song and delete the start and stop times. If you already did this, you're all set.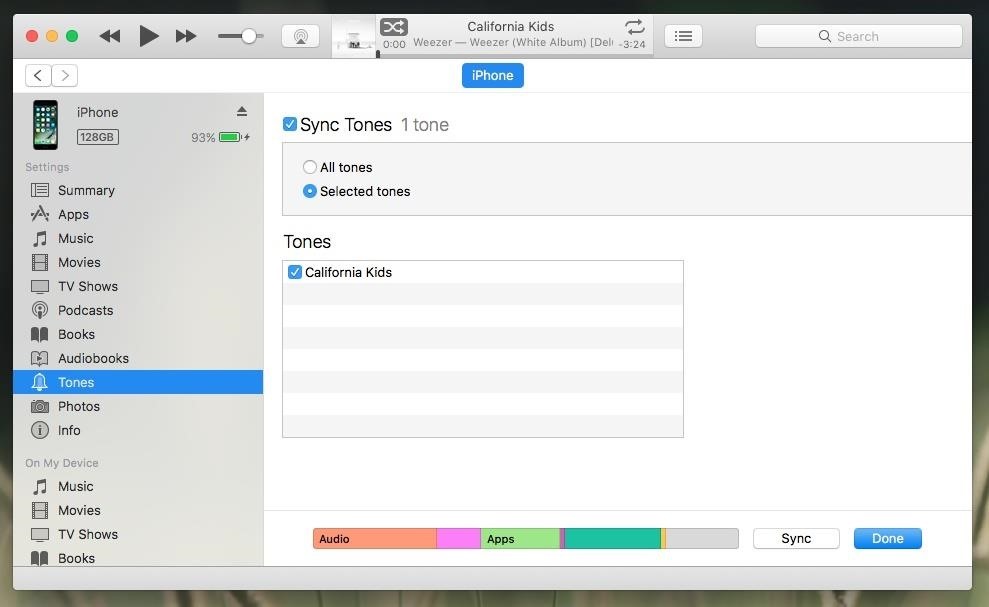
Step 8: Sync Tones with Your iPhone (iTunes 12.6 & Under)If you want to skip the cables and wirelessly sync your iPhone with iTunes, make sure the connection is set up ahead of time. Otherwise, plug your iPhone into your computer. If you don't see your iPhone right away, click the "iPhone" button in the top-left corner of the display to head to the Summary screen.Now, select "Tones" in the left-hand sidebar. If this is the first time you've synced ringtones or text tones to your iPhone, you need to check "Sync Tones," then "All tones" or "Selected tones" from the options. If you choose the second option, make sure the tones you need are checked. Finally, click "Sync." You can unplug your iPhone once syncing has finished.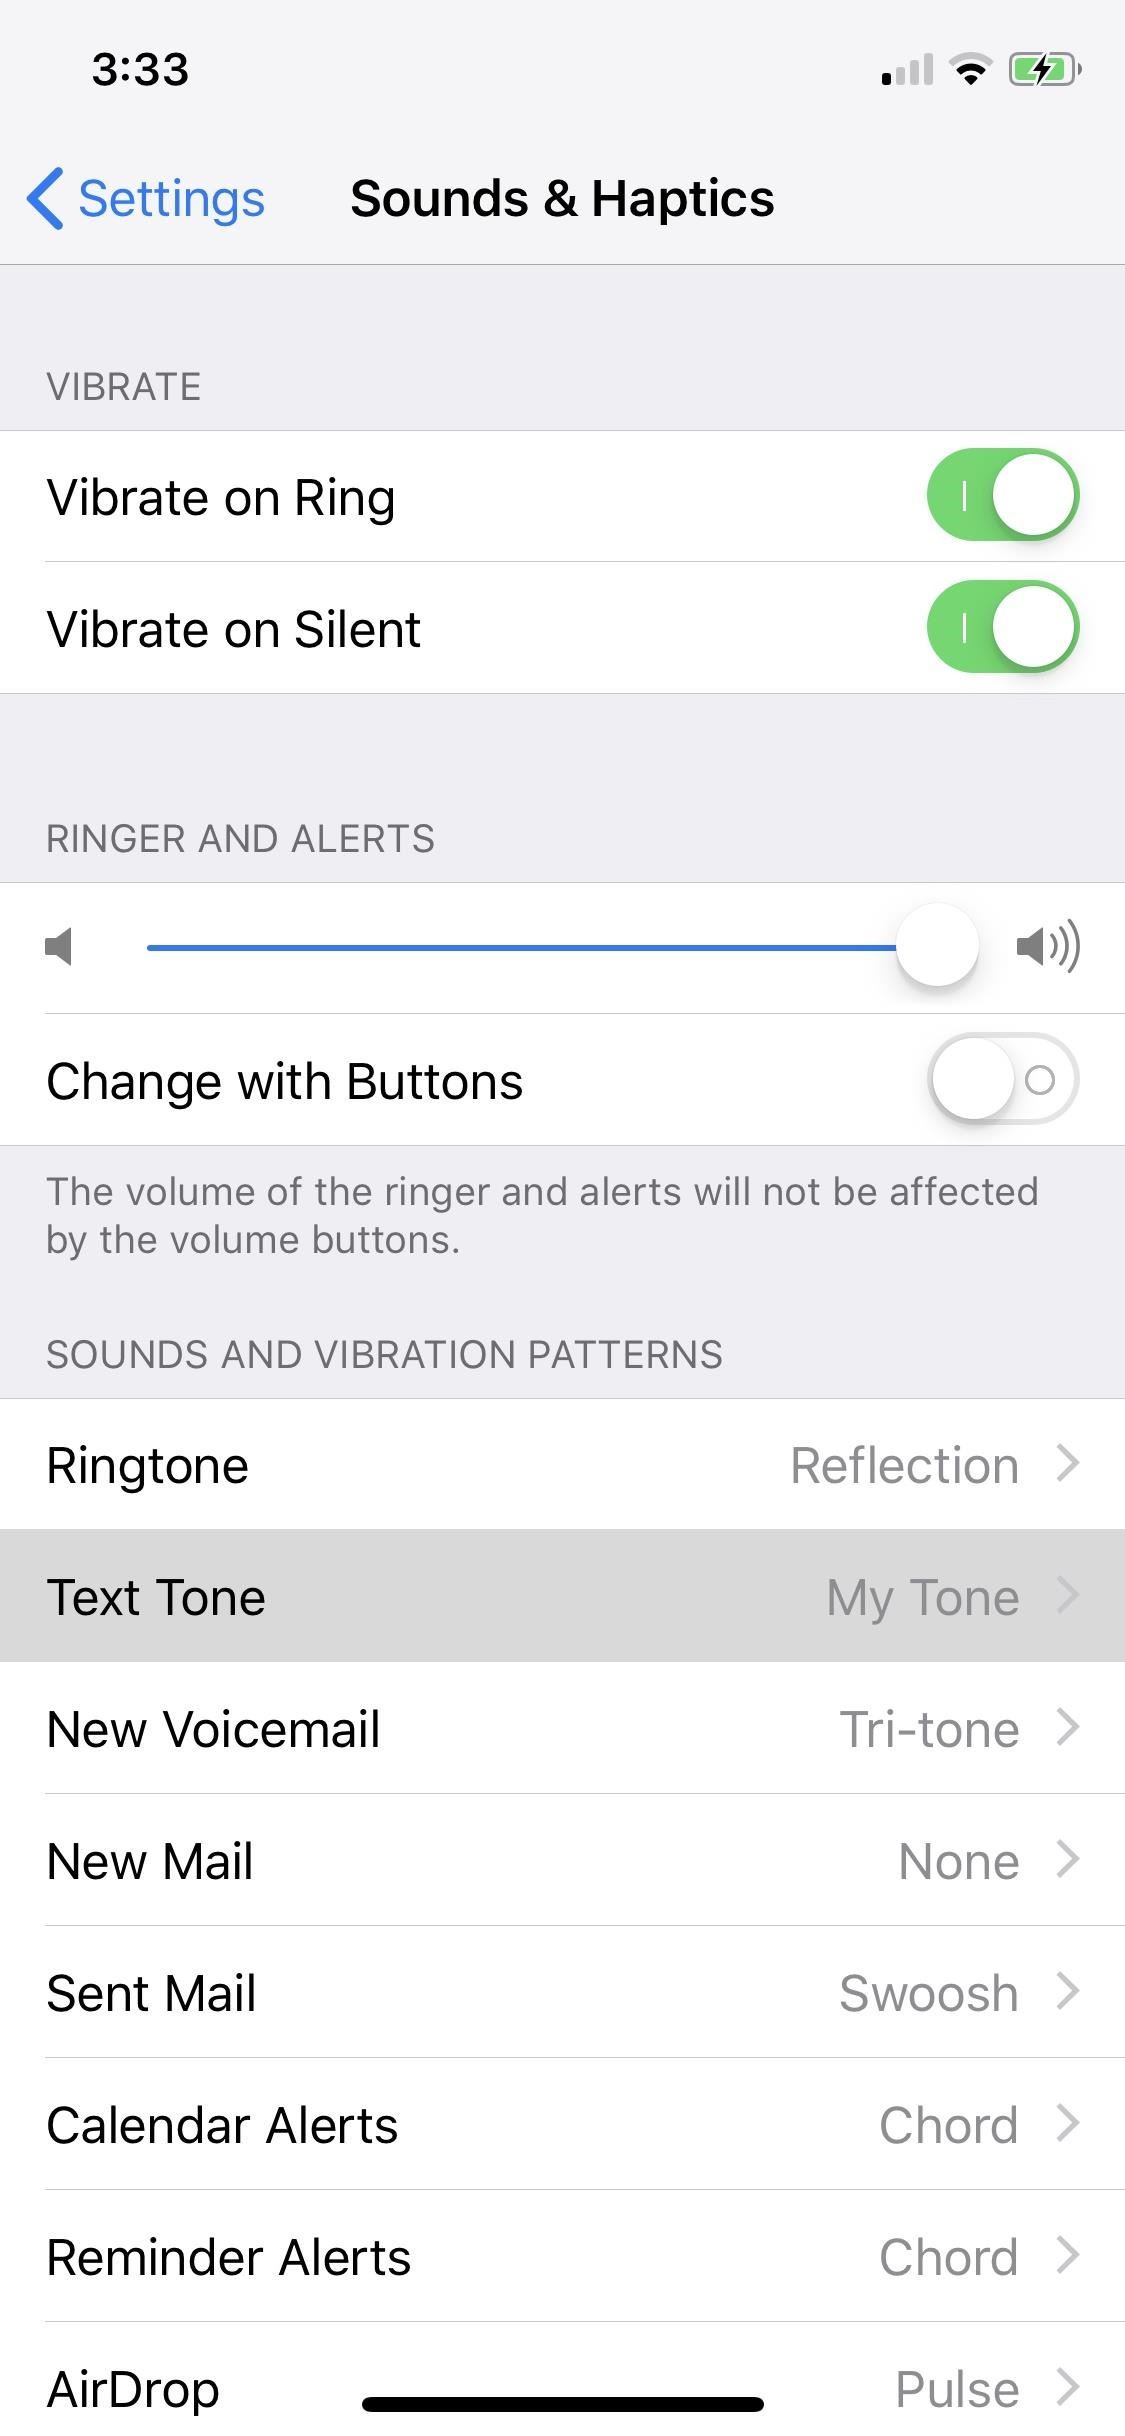
Step 9: Set Your Text Tone on Your iPhoneIf everything went well, you should find your tone on your iPhone. Jump over to Settings –> Sounds (Sounds & Haptics on recent models) –> Text Tone. Unfortunately, since you cannot differentiate between custom ringtones and text tones, your tones will be listed under the Ringtones section at the bottom. Your custom sounds will appear above the stock ringtones. You can even assign this custom text tone to specific contacts. Open each contact page, tap "Edit," select "Alert Tone," and select your custom sound.Don't Miss: How to Set Custom Vibration Alerts for Individual iPhone ContactsFollow Gadget Hacks on Pinterest, Twitter, YouTube, and Flipboard Sign up for Gadget Hacks' daily newsletter or weekly Android and iOS updates Follow WonderHowTo on Facebook, Twitter, Pinterest, and Flipboard
Cover image, screenshots, and GIF by Jake Peterson/Gadget Hacks
Learn how to install an iPhone case for your Apple iPhone 4 and 4S. Learn how to remove the cover from your iPhone 4 and 4S. The simple demo will help you become an expert in a minute.
How to Put On and Take Off an iPhone Case - totallee
In order to save money, a few compromises had to be made when switching to Google Fi on an iPhone. No more Wi-Fi calling, no automatic network-switching, no hotspots outside the US, and no more visual voicemail. I've found that last one particularly frustrating — but not anymore.
Google Fi News & Guides « Smartphones :: Gadget Hacks
How To: Quick Reply & Compose Text Messages Without Leaving the Current App on Your iPhone How To: iOS 12 Adds Quick-Reply Tapbacks to iMessage & Text Notifications on Your iPhone How To: Connect an External Display to Your MacBook, MacBook Air, or MacBook Pro
How to change text message quick responses on Android
Instagram's cute face filters, like puppy dog ears, are actually AR filters! And with over 400 million people using Instagram Stories every day, brands are starting to cash in on the virality of face filters by creating their own custom AR filters for Instagram Stories.
The future of Instagram face filters is glossy, metallic, and
In this video, we'll be showing you how someone with enough skill could theoretically snatch your Apple Watch to make purchases using Apple Pay—no matter if your Watch is passcode-protected or not.
Thieves can bypass Apple Watch passcode to pair a stolen
From customizing Quick Settings to keeping photos private, these handy Samsung Galaxy phone tips will help you make the most of your device. 10 Tips Every Samsung Galaxy Phone Owner Should Know
10 tips to make the Samsung Galaxy Tab S3 the best it can be
How to Print your family tree from your MyHeritage account
Spotify PSA: Reminder to disable loudness normalization (self.audiophile) submitted 3 years ago * by Umlautica Hear, hear! Loudness normalization reduces the dynamic range of the music but fortunately can be disabled in Spotify.
Pro Tip: Turn OFF Spotify's "Normalize Volume" Setting
In this softModder tutorial, I'll be showing you how you can keep Samsung's light flare or ripple effect AND have a secure lock screen at the same time. With a stock Galaxy S4, you can only have
Customize Your Android Lock Screen with New Unlock Effects
Name the phone, add the number then click Activate Google Voice Mail on this phone. You'll see a window pop up giving you a code to enter onto your phone's dial pad. This varies based on your carrier.
How to Set up Google Voice on iOS or Android Smartphones
If you've ever seen a crazy photo on the internet and wondered whether it's even real, you might be excited to find that yes, there's an app analysis tool for that.. The FotoForensics website, developed by computer scientist Neal Krawetz, has been around since 2012 - which can make it feel a bit arcane by modern web design standards.
Spot faked photos using digital forensic techniques | Popular
0 comments:
Post a Comment