How To: Hide @iCloud, @Me & Custom Aliases from Your Mail App's 'From' Field on Your iPhone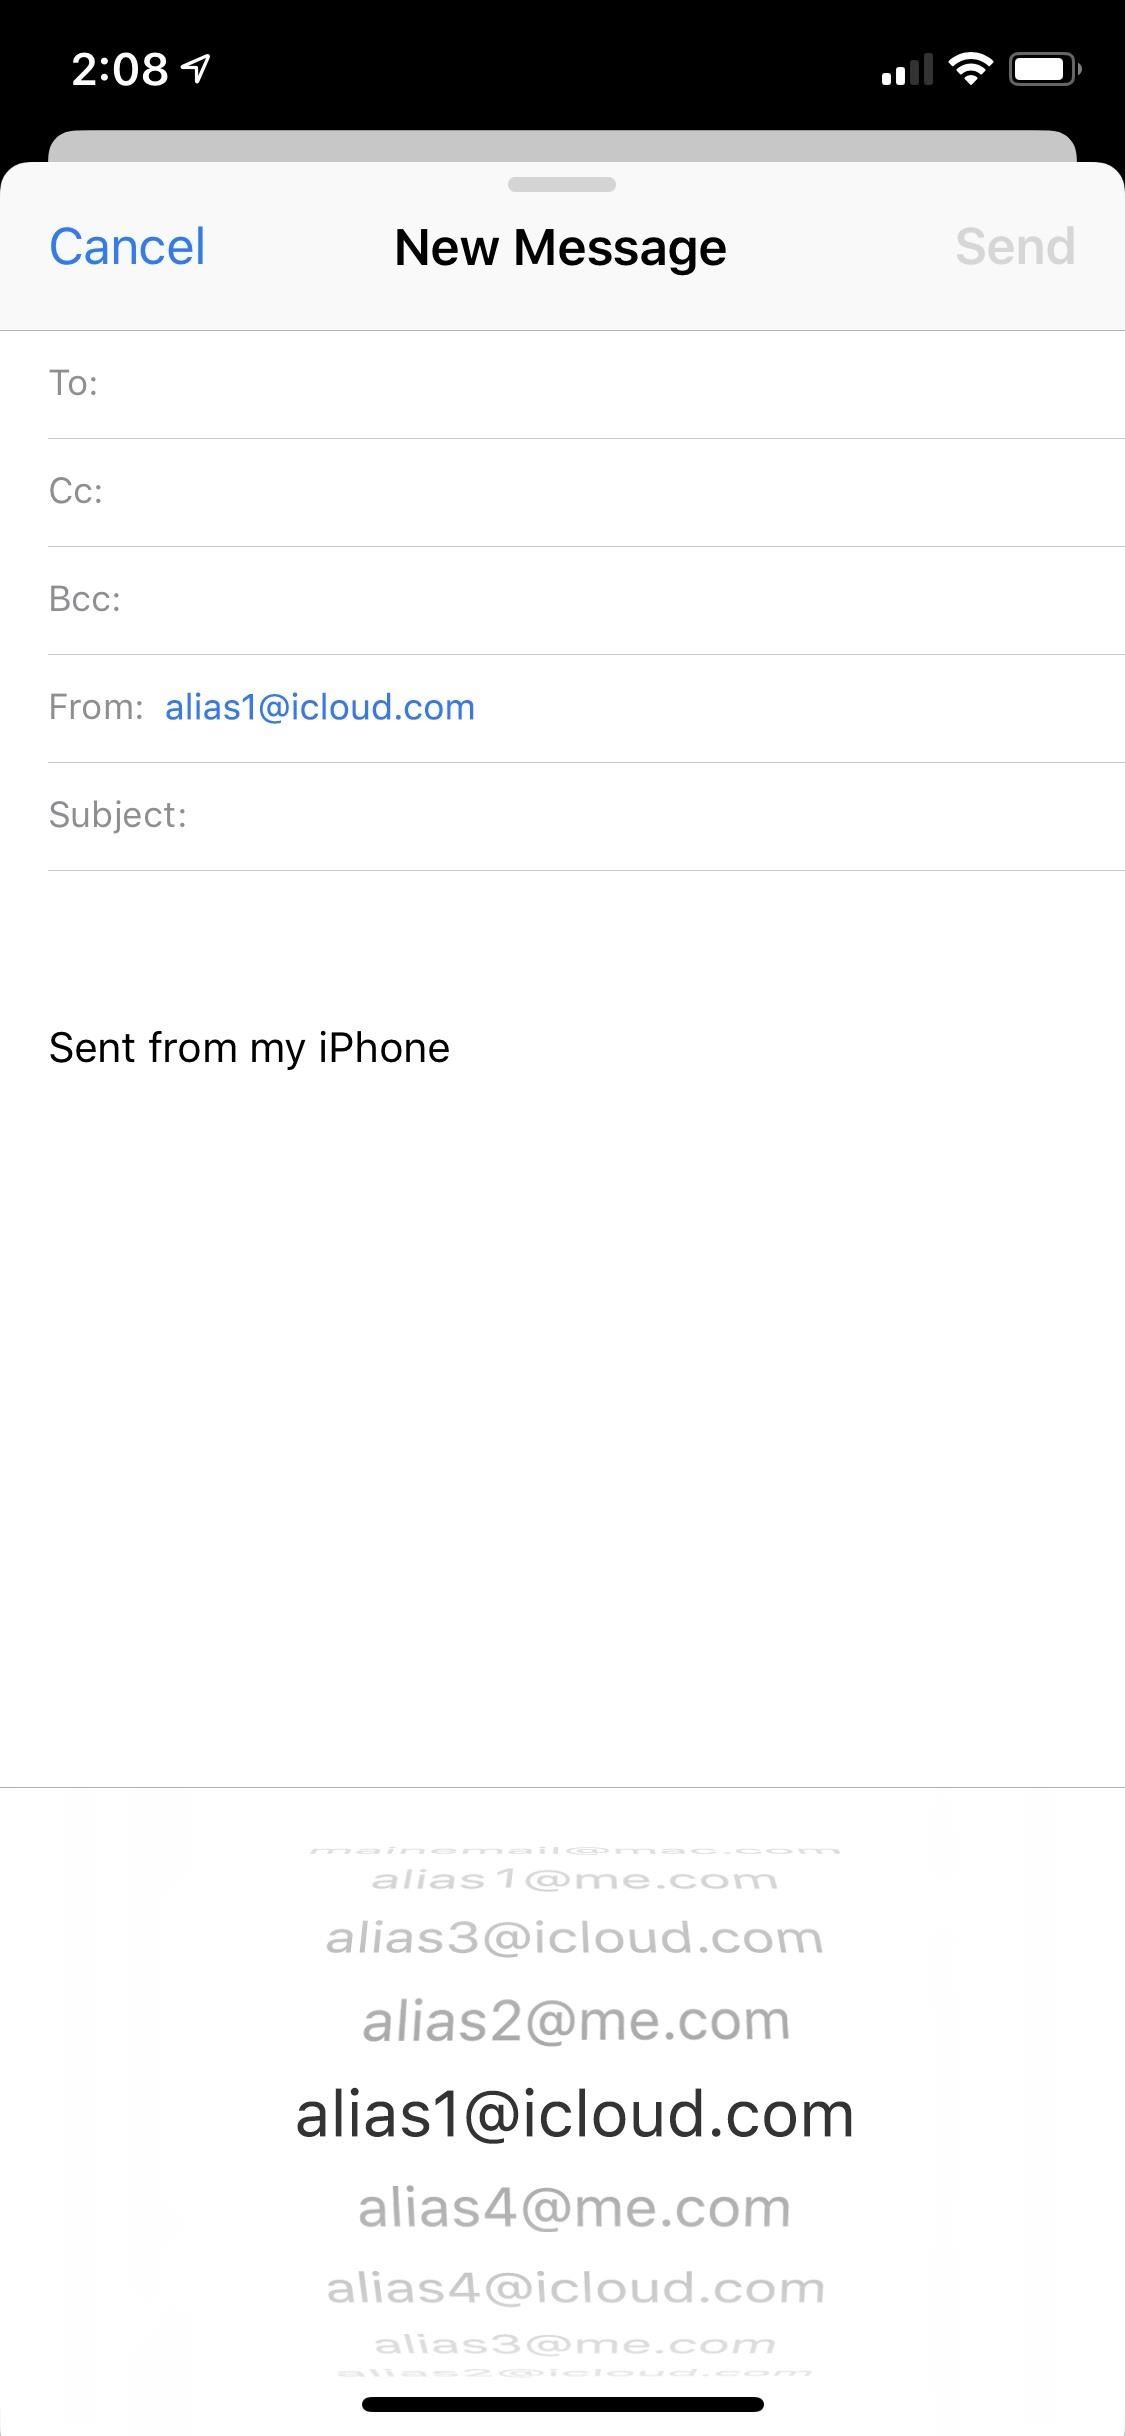
If you use Apple's email services and the "From:" field in your iPhone's Mail app is cluttered with @Mac.com, @Me.com, and @iCloud.com variations of the same address — along with third-party accounts — there's an easy way to declutter things and hide the addresses you don't use anymore.In January 2000, Apple released iTools to Mac OS 9 users. The service included an @Mac.com email address, along with other free, internet-based services. Over the following years, the service was rebranded as .Mac in 2002, MobileMe in 2008, and iCloud in 2011. At each step, data and email accounts were migrated to the succeeding service.Depending on when you signed up for the service, you may have an @iCloud.com, @Me.com, or @Mac.com email address, along with each iteration that followed. For example, if you were an early adopter of the original Mac.com service, you have access to youremail@mac.com, youremail@me.com, and youremail@icloud.com, with all of them delivering email to the same account.Don't Miss: 5 Mail Features You Might Not Know About for iPhone Further confusing things is the fact that Apple has always allowed individuals to create custom email aliases. These are email addresses that deliver email to your primary address but can be changed or discarded whenever you don't need them anymore. They make a great option when you'd rather not give out your primary address, want to sign up for a mailing list, or when you're worried about receiving spam. Regardless, they still show up in your "From:" field, further cluttering it. Before and after decluttering the "From:" options. While it may be nice to have a choice of which email address you want to use, it can be frustrating to see the "From:" field of your Apple Mail app cluttered with each iteration of your email address, especially if you're in the habit of only using one of them. Fortunately, there's a simple way to hide the aliases you're not using.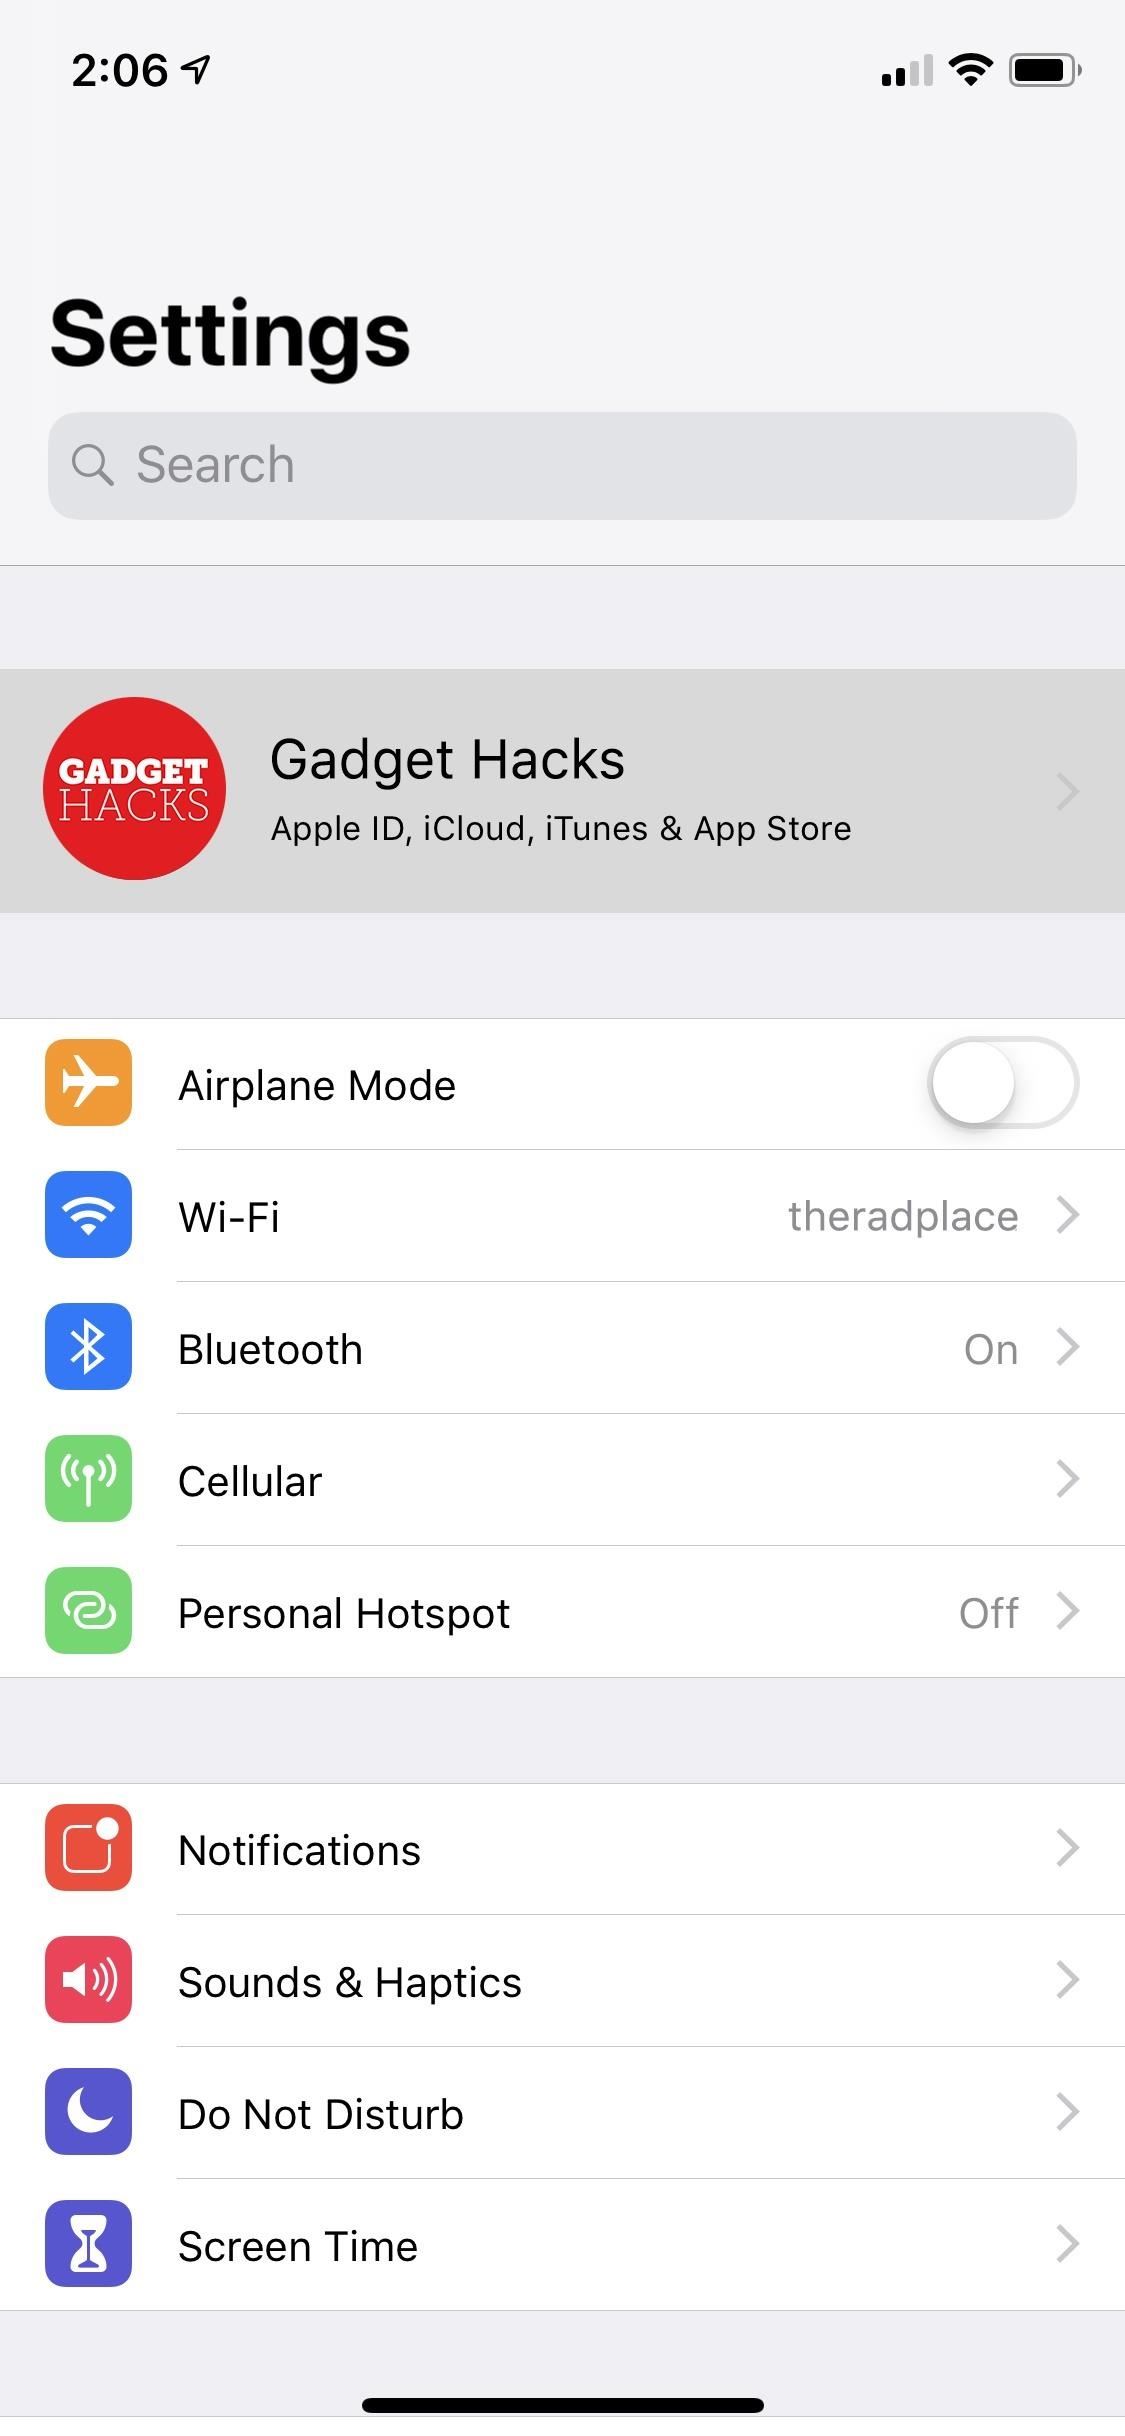
Step 1: Open Your iCloud Email SettingsTo hide those annoying aliases in iOS 11 or iOS 12, the first step is to open the Settings app on your iOS device and select your name at the top of the list. After that, select the "iCloud" settings, then scroll to the very bottom of the next page and select "Mail" to open the iCloud email settings.Alternatively, you can get to the same place by going to "Passwords & Accounts" in Settings. Tap "iCloud" one there, then "Mail" from the bottom of the iCloud email settings page. For iOS 10 users and below, you can get to the same place by opening up "Mail" in Settings, tapping "Accounts," then "iCloud," and selecting "Mail" from the bottom of the list. Alternatively, you could open "Mail, Contacts, Calendars" in Settings, then tap "iCloud," followed by "Mail" at the bottom.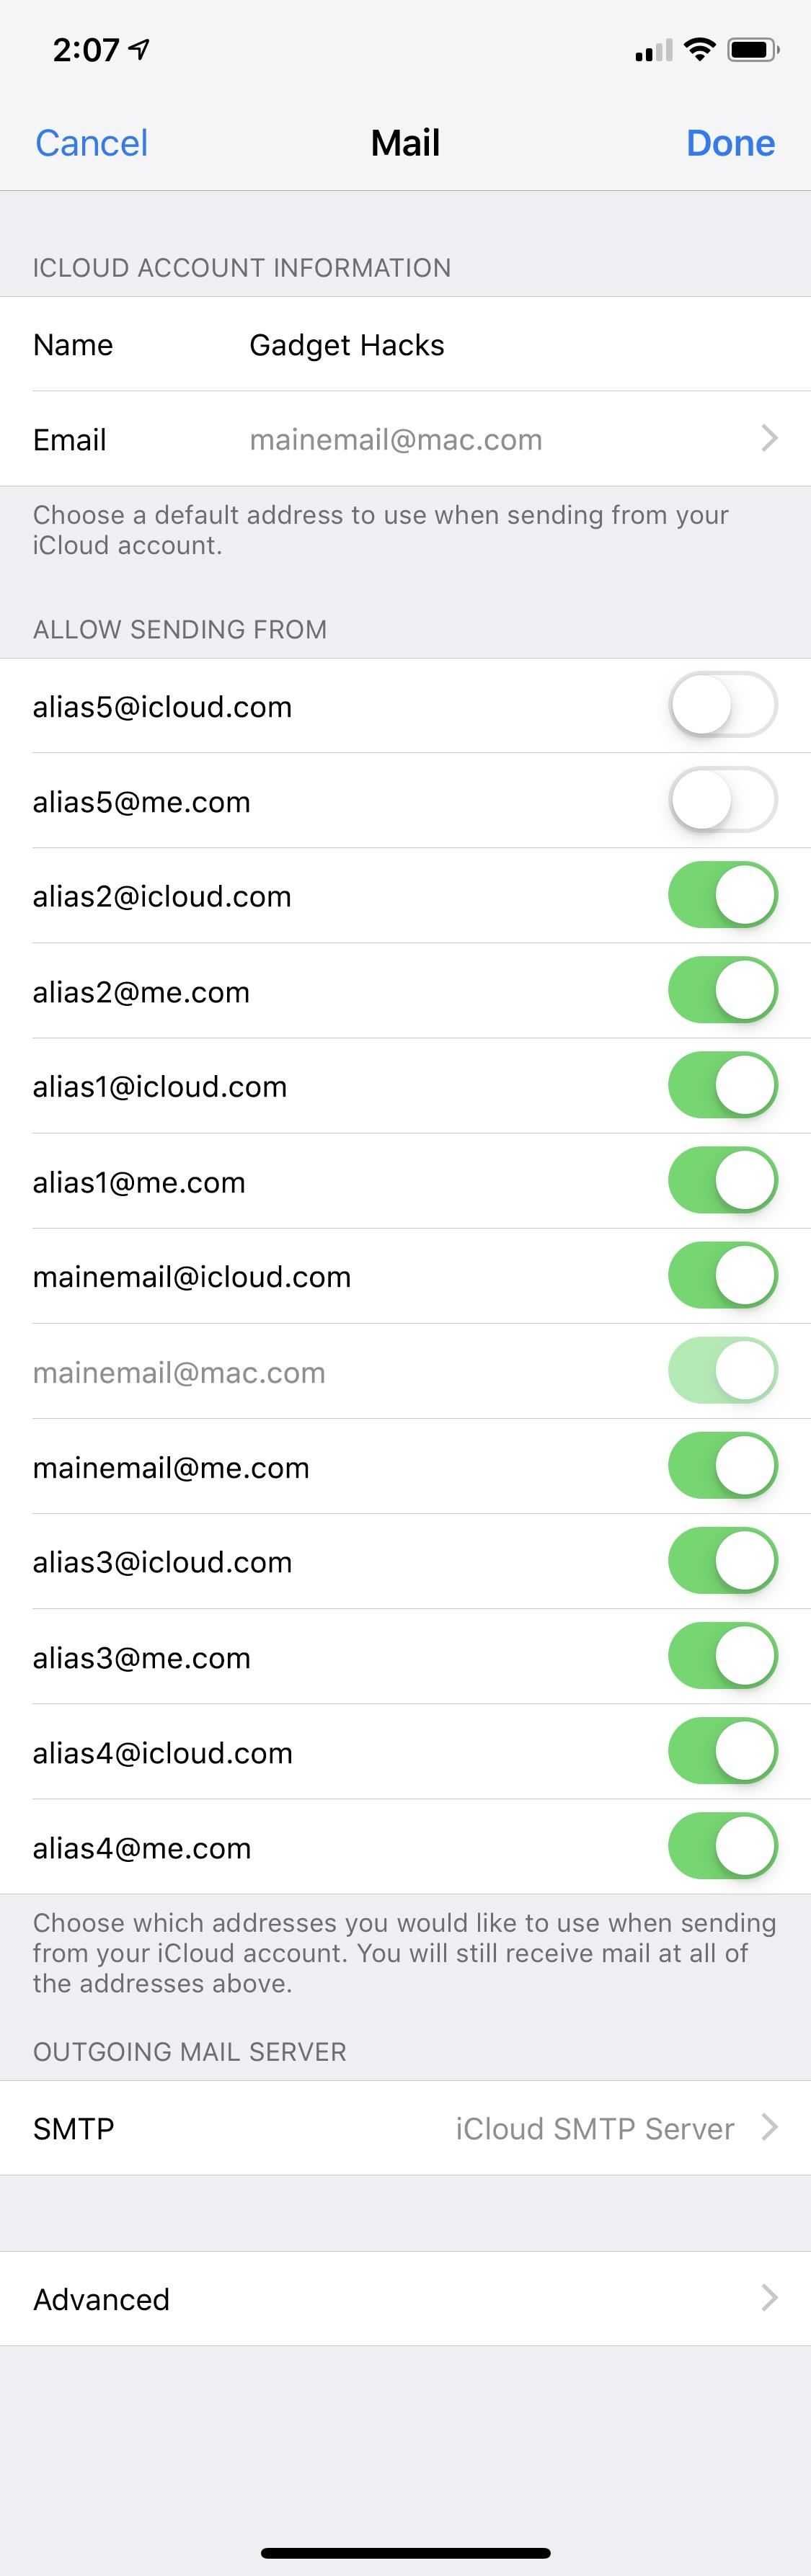
Step 2: Hide Aliases You Don't Use MuchYou'll now see a list of email addresses associated with your iCloud account. The list will likely include any previous iterations of the email address that are still being used. What this list does not show are any third-party emails you have connected to Mail, like Gmail, Yahoo, and Outlook.Simply deselect the Apple aliases you don't want showing up in your "From:" field when you compose emails. You won't be able to deselect the email address you use for your Apple ID — that one will be grayed out — but you should be able to deselect all of the others. Tap "Done" to save your settings. You will still receive emails at the hidden addresses. However, you won't be able to send emails from those addresses as long as they're hidden, and any replies to emails sent to those addresses will be sent from the email address you left visible in the above settings.This won't impact any other email addresses you use in Mail, such as Gmail, Yahoo, Outlook, or a work address.If you have an iPhone, iPad, and Mac, you should only have to do this on one device for it to take effect on all of them, as your Mail settings are saved to iCloud. Some users have reported that iOS software updates reset these toggles, so you may have to update these again later. Personally, we haven't experienced this issue and settings persist after every update.
Step 3: Manage Unwanted Email Addresses (Optional)Don't think you'll ever use those aliases ever again? You can actually delete them from your iCloud account for good or just disable them temporarily. However, you can't do this from your Mail app — you need to do it from a browser.Open up icloud.com in a web browser, sign in with your Apple ID and password, select the "Mail" option, then the cog in the bottom left. From the menu that appears, select "Preferences." Next, select the "Accounts" tab, then choose the alias you want to manage from the left column. On the right, you can check "Disable alias" to temporarily remove it or select "Delete" to get rid of it altogether.Disabling an alias is temporary, while deleting will remove it entirely and cause mail sent to it to be returned to the sender.Also note that if you have more than three aliases, and you delete one, you will not be able to create another alias. Apple only allows three aliases at any time now but did allow five total before. If you have five, you're grandfathered in and can keep them, but only if you don't delete them. For those that only have three or less, you can delete an alias and make a new one in its place. If you want to remove third-party accounts, such as a Gmail, Yahoo, Outlook, or a work address, you'll need to manually delete them from the "Passwords & Accounts" menu in the Settings app.Don't Miss: How to Add Email Accounts to Mail in iOS 11 & iOS 12Follow Gadget Hacks on Pinterest, Twitter, YouTube, and Flipboard Sign up for Gadget Hacks' daily newsletter or weekly Android and iOS updates Follow WonderHowTo on Facebook, Twitter, Pinterest, and Flipboard
Cover image and screenshots by Justin Meyers/Gadget Hacks
How to Add Links in Instagram Story - A tutorial on how to put "see more" links in your instagram story. Some accounts that are not verified can now add swipe up links to their instagram story.
App Builder Appy Pie has been rated as the Best Mobile App Maker online. Now Learn how to create an app for free in 3 steps with Appy Pie's DIY App Maker, Once created you can then Publish your mobile app quickly & easily to Google Play & App Store with this award winning App building software.
Android Mobile App Market for AppMakr Apps
System and Data Protection How to make a full backup of your Windows 10 PC A full backup is crucial to safeguard your system and files, and in this guide, we'll show you the steps to create one
How to create a system image in Windows 10 - CNET
News: Google Teases Nexus 6 in Leaked Android Ads How To : View, Share, Highlight & Download Your Archived Instagram Stories How To : Secure Any Android App with Your Fingerprint
How to Stop Android Lag in Its Tracks on Your Nexus 7 for a
Using a free, easy-to-use Chrome extension called BlockSite you can make the process of blocking sites on Chrome as easy as two clicks. There are several apps that can help you block sites when you're accessing the web via Chrome on a mobile device as well. Visit Business Insider's homepage for more stories.
Top 20 GNOME Extensions You Should Be Using Right Now
Doing either of the above steps will only remove the app from the Apple Watch and not the iPhone. To remove an app from both devices, simply uninstall the app from your iPhone like normal. There is no way to keep the app on the Apple Watch if you want to remove it from the iPhone. If it's not on the iPhone, then it can't run on the watch.
Remove built-in Apple apps from the Home - Apple Support
Given how much use it gets on a daily basis, the power button is always one of the first hardware features to call it quits on an Android phone or tablet. So if your power button is acting up, or you don't want it to, you can extend its lifetime by simply finding ways to use it less.
How to restart your Android without working power button
Create an account or log into Facebook. Connect with friends, family and other people you know. Share photos and videos, send messages and get updates.
Add Facebook Notifications and Chat to Firefox's Toolbar
Password Manager - Remember, delete, change and import saved
This is how I process my DSLR photos using VSCO on my iPhone! Gear used to take the photos: Canon 6D -
In this video tutorial, viewers learn how to control which games can be played with Net Nanny. Begin by opening the program and select Manage Games under Games. Users will have 3 options on how to block or allowing the games.
Parental Controls: Can I enter *.* to block all websites
How To: Your Android Device Can Help Save Lives While You Sleep: Here's How to Help Out How To: Improve Battery Life on Your Nexus with the Hells-Core Kernel How To: Increase Battery Life on Your Samsung Galaxy S5 for More Power Every Day How To: Make a DIY Battery-Powered USB Charger
Can't Sleep? This App by US Navy Veteran Can Help « Gadget Hacks
0 comments:
Post a Comment